If replacing your shed roof is this only option, read our guide on what shed roofing material is best and how to install it!
Have you noticed your shed roof needs a bit of a makeover? Repair or replace, that’s the question! Sometimes replacing is the only option though so we’re here to help with an easy, DIY-friendly how to.
Repair or replace
A sagging or leaking shed roof is the most common reason why someone will look to either repair or replace it but your first step is to identify if the issue can be repaired, or whether replacing your whole shed roof is the only option.
We have another blog detailing how best to repair sagging or leaking (or both) shed roofs so be sure to check this out first before reading on!
What roofing material is best?

Felt, tiles...nah, bitumen roofing sheets!
We are, of course, going to be a little biased when it comes to what material you should use when replacing your shed roof but we have good reason to be. Our bitumen roofing sheets are a cost-effective and inexpensive way to keep your shed watertight. They’re also:
- Easy-to-install
- Durable
- Weatherproof
- Long-lasting (a minimum 10-year guarantee!)
- Eco-friendly
- Lightweight
- DIY-friendly
Yes, they are more expensive than felt, but they will last a lot longer too, and they come in a variety of different colours and styles including:
- ONDULINE CLASSIC for the (you guessed it) classic corrugated look
- ONDUVILLA for a tiled look
- BARDOLINE for the look of shingles (the closest look to felt)
For more information about our roofing sheet options and why they are better than the traditional felt or tiles, read our ‘what is the best material for your shed roof?’ blog.
How to install new shed roofing
Once you have decided to replace your shed roof and what material you are going to use, you’re going to want to know how to replace it, right?!
With most other materials you are most likely going to have to remove the existing material on your shed roof. If you are replacing felt with felt, for example, you will need to strip the old felt off your shed roof first.
An added benefit of our roofing sheets...they can be installed on top of existing felt!
How to install ONDULINE CLASSIC roofing sheets?
You won’t believe how easy it is ;)
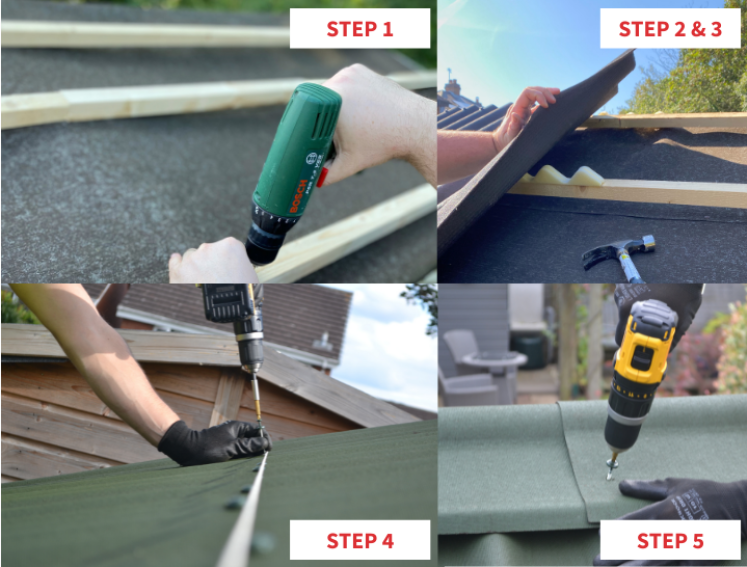
Once you have prepared your shed roof by fitting wooden battens to it (at an equal distance apart), all you need to do is follow these next 4 simple steps:
- Lay the sheets over the gutter line with an overhang and lay them in the opposite direction to the wind
- Lay your second row so the first sheet is parallel to the corrugations but not in line with the first
- Fix the sheets at the eaves, overlaps and ridges with the correct fixings
- Fix a verge to the edge for ultimate aesthetic, waterproofing and wind resistance, fixing to the sidewall first and then the roofing sheets with an overlap
And you’re done...admire your handy work!
You can find more information about maximum batten distances and minimum overlaps by reading our full ONDULINE CLASSIC installation guide. We also have a super helpful ONDULINE CLASSIC installation video - ideal if you find watching someone else install something first easier than written instructions.
For that extra waterproof touch…
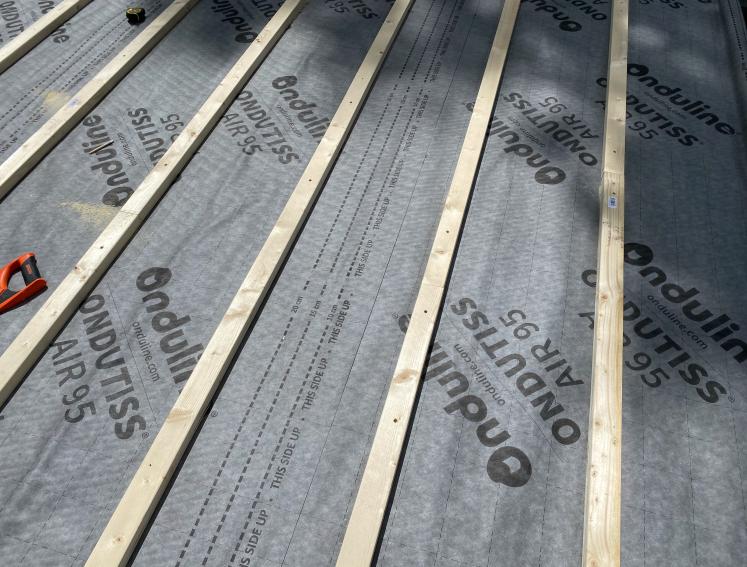
Try our ONDUTISS membrane!
For best results when it comes to installing our roofing sheets, you will want to make your existing roofing structure as waterproof as possible and this is where our ONDUTISS roof membranes come in. Breathable, they protect against humidity, wind and condensation keeping your roof in tip-top condition, along with our roofing sheets.
Ready to start your shed re-roofing project? Our roofing sheets can be purchased via our eShop. Select ranges are also available via The Range, Amazon, and Wickes.
Discover the full range at onduline.co.uk.