HOW TO INSTALL A FENCE USING ONDULINE CLASSIC SHEETS?
ONDULINE® CLASSIC is the market leading bituminous corrugated roofing sheet, that has traditionally been used to cover the roofs of timber buildings, such as sheds, stables, agricultural and garden buildings. With it’s excellent durability, ONDULINE® CLASSIC is made from approximately 50% recycled cellulosic fibres, which are derived from wood giving the panels their mechanical strength that make them well suited as an aesthetic fence covering for existing fences and gates.
The Onduline material does not contain any asbestos, or harmful chemicals, and is free from metal so it will never rust!
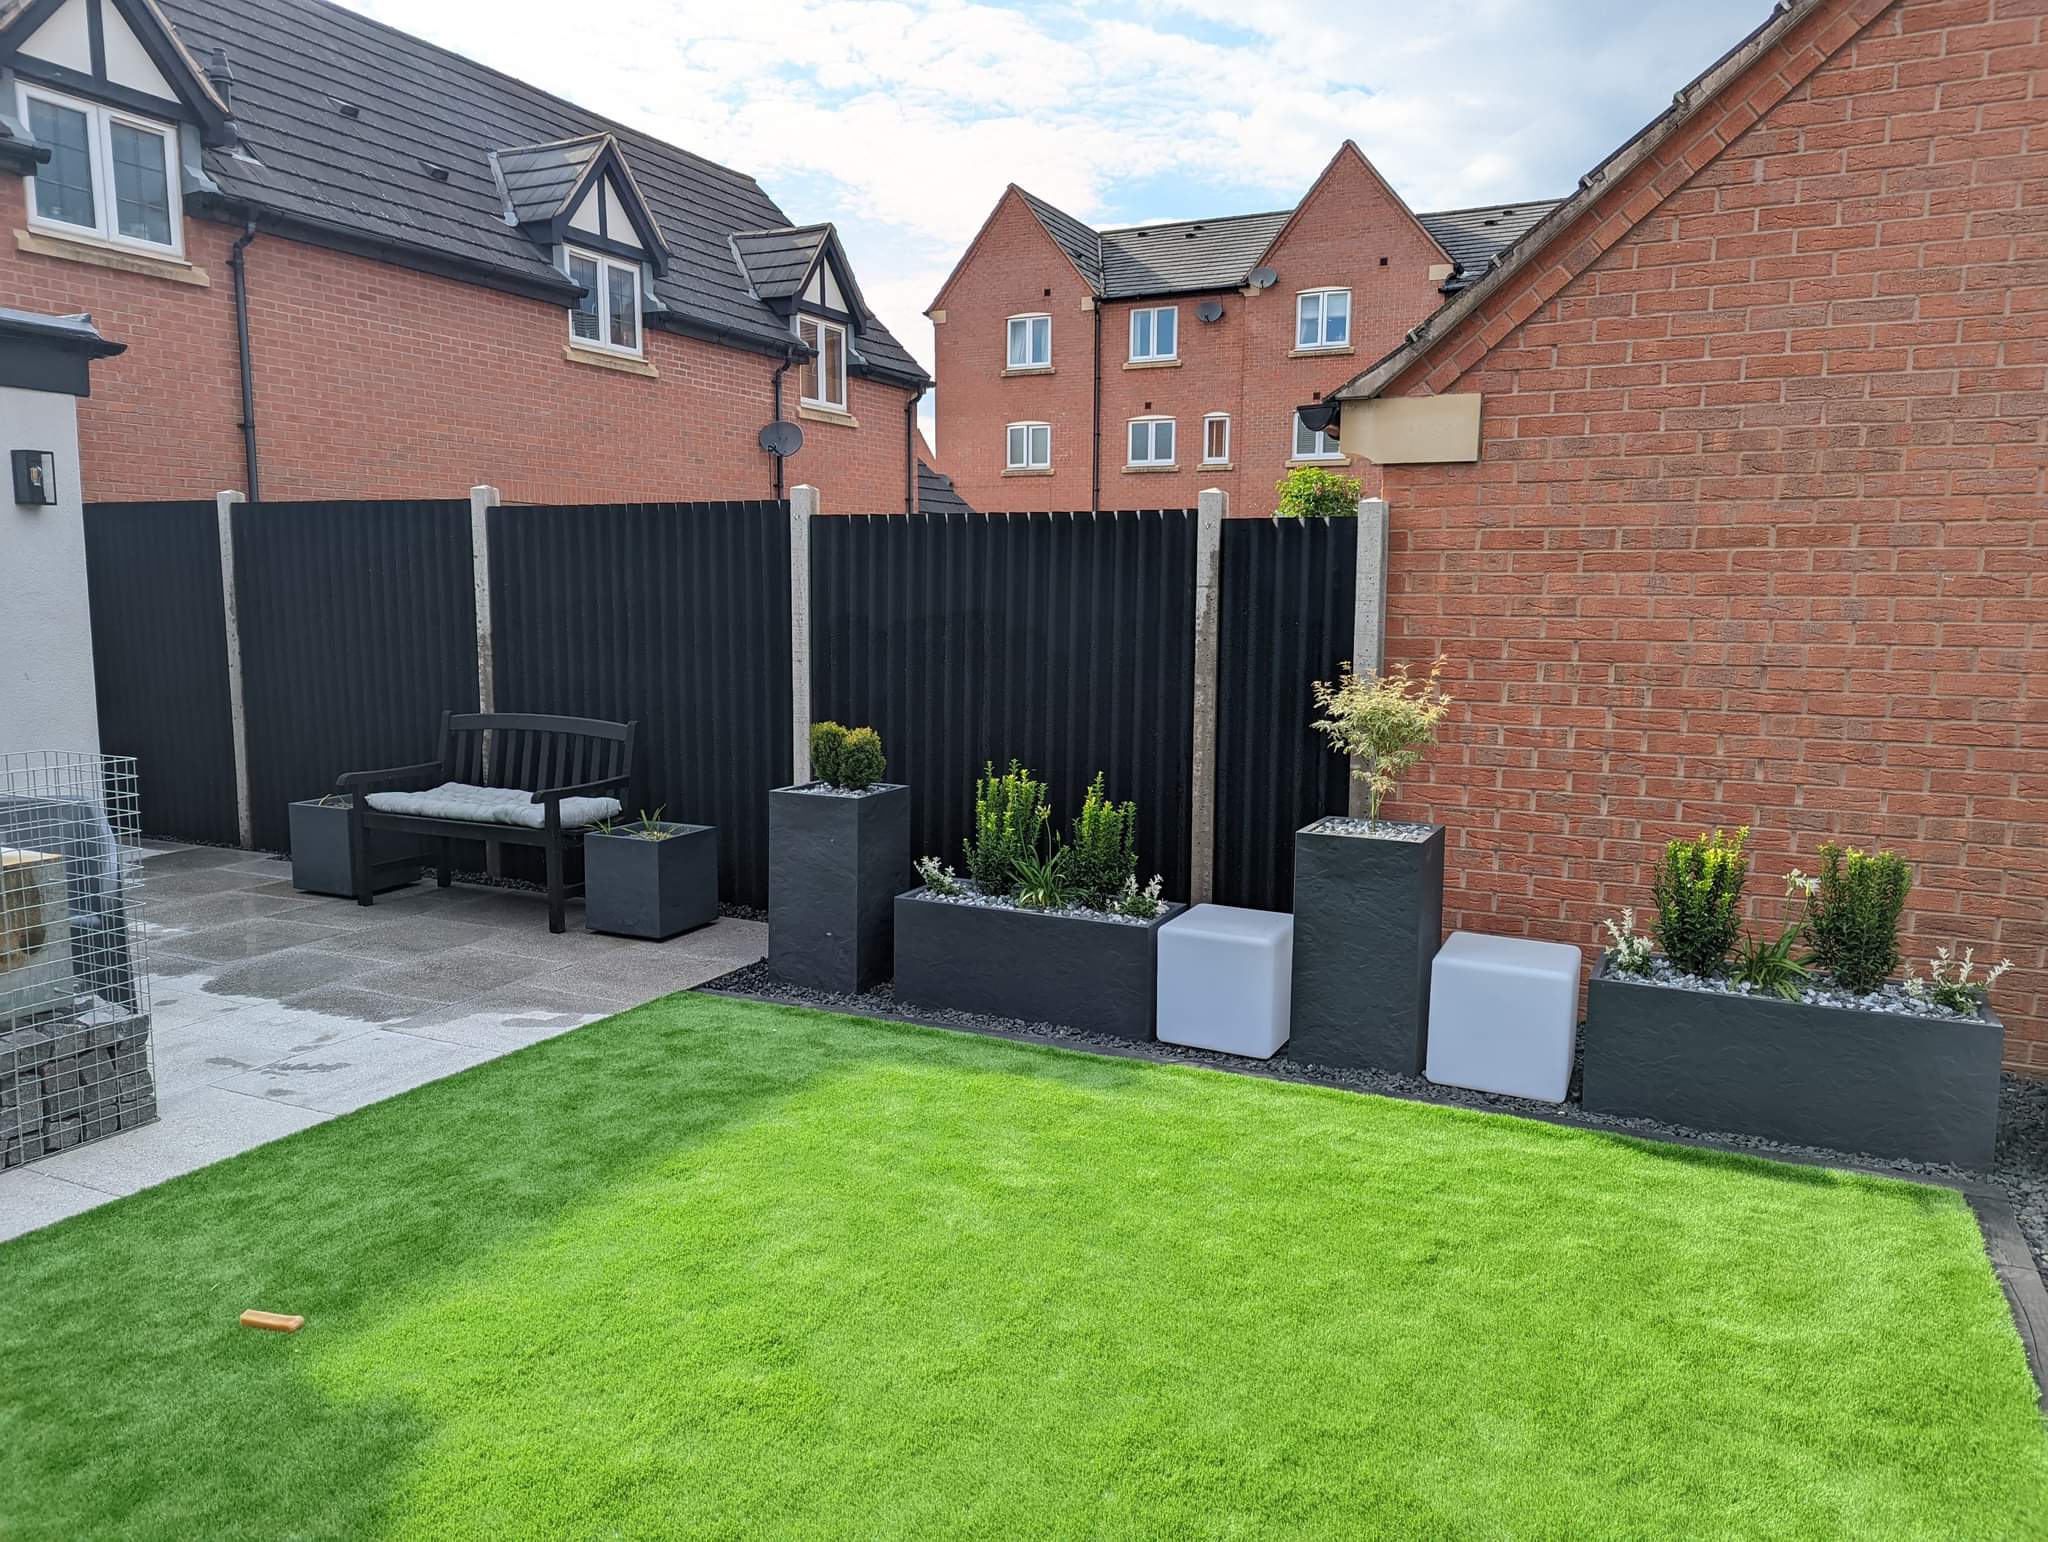
Thanks to their lightweight (about 3.4 kg/m2) and their great mechanical flexibility, ONDULINE® CLASSIC sheets are easy to install. The corrugated aesthetic of the sheets has become a popular choice for fence panels and adds a stylish look to any garden or outdoor space.
Fence Panel Installation Conditions
- Installation is possible over an existing fully boarded fence with a mimimum 30 mm thickness.
- ONDULINE® CLASSIC sheets can be installed on a fully boarded fence panel with additional support battens if the existing fence panel is less than 30mm thick.
What do you need?
- ONDULINE® CLASSIC sheets (200x95cm)
- ONDULINE® UNIVERSAL SCREWS
- Hand Saw
- Lubricant Spray
- Safety Gloves
- Other tools may include: Tape Meausure and Electric Drill.
Installation Steps: ONDULINE CLASSIC for fences and gates

Step 1: Ensure fixings have enough structure
ONDULINE® CLASSIC sheets require a continuous fixing structure of a minimum 30mm thick. This ensures adequate fixings strength and thickness to avoid the fixings protruding beyond the fence panel.
ONDULINE® UNIVERSAL SCREW fixings must always have a bite of a minimum 15mm into the fence panel.
Step 2: Preperation
Ensure the existing fence is in good, sturdy condition and suitable to fix to.
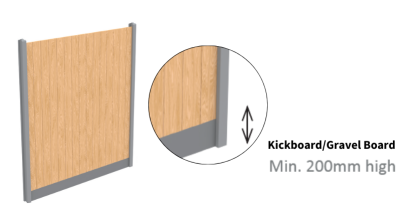
Ensure a kickboard is present of a minimum 200mm from ground level.
Step 3: Fix the sheets
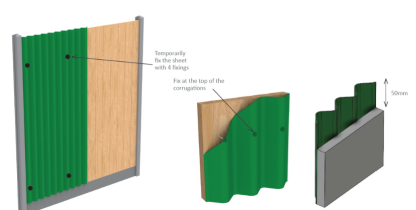
- Hold the ONDULINE® CLASSIC sheet against the fence (where possible, the weight of the sheet should rest on the gravel board).
- Use four ONDULINE® UNIVERSAL screw fixings to pin the sheet in place temporarily as show in the picture.
- Make sure the sheet does not extend more than 50mm on top of the fence panel. If necessary, cut the sheets using a lubricated hand saw.
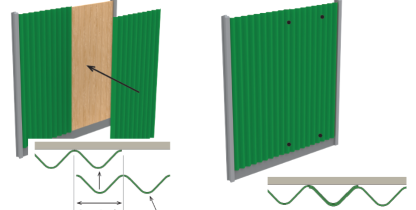
Step 4: Overlapping the sheets
Rest the second ONDULINE® CLASSIC sheet against the fence and use another four ONDULINE® UNIVERSAL fixings to pin the sheet in place temporarily as show in the picture.
Overlap the sheets by one corrugation.
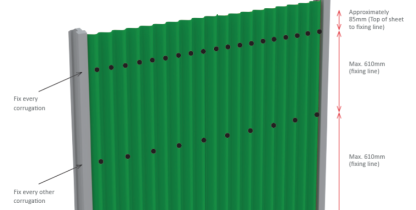
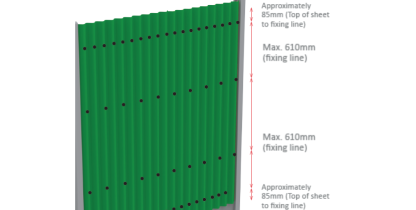
Step 5: Fixing pattern
Fix the rest of the ONDULINE® fixings. All corrugations should be fixed at the top and bottom sections.
Every other corrugation should be fixed in between.
Note: Always fix the overlapping corrugation.
Step 6: Fixing the sheets
Ensure fixings are securely in place as per pattern shown with the correct spacing.
Download the full installation steps below
Fence Panel Installation Conditions
- Installation is possible over an existing fully boarded fence with a minimum 30 mm thickness.
- ONDULINE® CLASSIC sheets can be installed on a fully boarded fence panel with additional support battens if the existing fence panel is less than 30mm thick.
What do you need?
- ONDULINE® CLASSIC sheets (200x95cm)
- ONDULINE® UNIVERSAL SCREWS
- Hand Saw
- Lubricant Spray
- Safety Gloves
- Other tools may include: Tape Measure and Electric Drill.
Installation Guide: Installing Onduline sheets as a fence
Download the full installation guide on how to install ONDULINE CLASSIC as a fence or gate, here
Looking for a stockist?
ONDULINE® CLASSIC sheets are widely available to buy from a number of retailers and merchants.
Click to find a stockist or find our products online, here.