Faq
- Can I use a breathable membrane in conjunction with ISOLINE and a full deck?
- How to integrate a Velux window with ISOLINE LOW LINE?
- Will my tiles leak if installed at a low pitch?
- Do I need to install counter-battens on a full deck roof to ensure proper ventilation beneath the ISOLINE system?
- Will the ISOLINE sheet leak where fixings penetrate it?
- What is the minimum roof pitch ISOLINE® LOW LINE is accredited for?
- How does ISOLINE® LOW LINE function?
- What are the main types of roof structures that ISOLINE® LOW LINE can be installed on?
- What is the required penetration depth for fixings?
- Where exactly should the fixings penetrate the ISOLINE® sheets?
- Can I use PV / Solar Panels in an ISOLINE roof?
- Heritage Specific: Is ISOLINE LOW LINE safe for Bats?
- Do I need to keep to the original tiling gauge when installing tiles on top of an ISOLINE roof?
- What is the minimum and maximum pitch for ISOLINE?
- Can I use ISOLINE on a vertical wall or as cladding?
- How long can ISOLINE LOW LINE be left exposed without a tile covering?
- How should contractors walk on the roof during installation?
- Do you need to use a Breathable Membrane in conjunction with ISOLINE LOW LINE?
- What precautions should be taken when installing roof tiles below the manufacturer's minimum recommended pitch?
- Can ISOLINE® LOW LINE sheets be used as a structural component when fixing solar panels?
- Where does the flashing sit? above or below the isoline sheet?
- Do I need Fire Barriers with ISOLINE?
- Is ISOLINE breathable?
- How do the ISOLINE® LOW LINE sheets overlap?
- How much weight can ISOLINE LOW LINE take on top?
- What is the maximum tiling gauge that can be used?
- Can I install a Roof Window with ISOLINE?
- Are there specific ventilation requirements for this system?
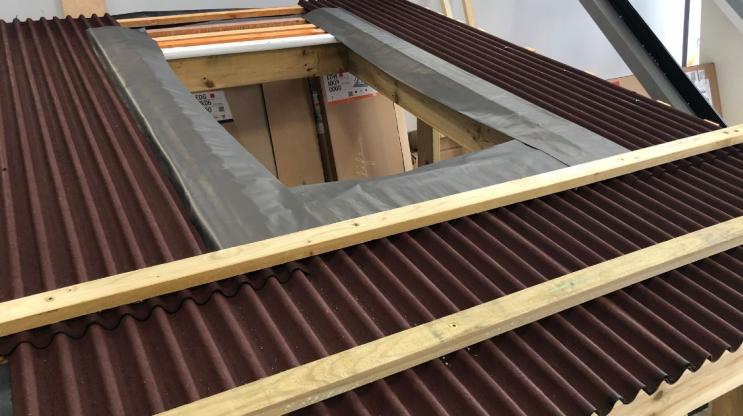
Integrating a Velux window into an ISOLINE LOW LINE sub-roof system requires careful attention to your roof pitch and a "double weathering" technique to guarantee a completely watertight seal.
Follow these guidelines for a successful installation:
1. Check Your Roof Pitch Requirements
Your choice of Velux window depends entirely on the angle of your roof:
Pitches between 10° and 15°: You must use the specific low-pitch Velux window model engineered to operate safely down to 10 degrees.
Pitches 15° and above: You have the flexibility to use any standard Velux roof window.
2. Implement Double Weathering Around the Frame
To ensure absolute water tightness, you need to achieve "double weathering" by sealing the window at both the sub-roof (Isoline) level and the external tile level:
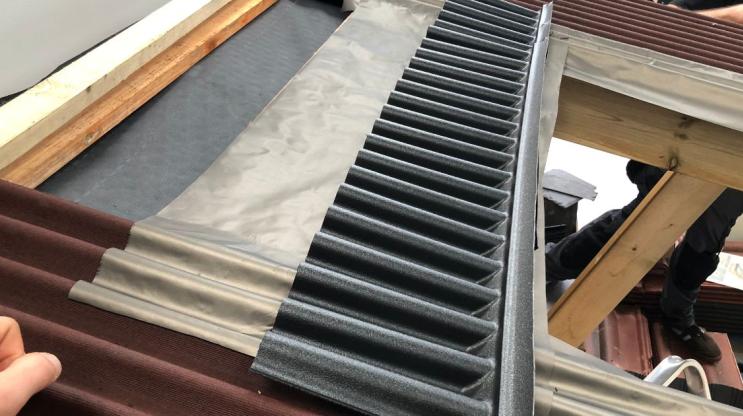
Sub-Roof Level (First Line of Defence): Use an Onduline apron piece positioned at the top of the Velux window. Seal the Isoline Low Line sheets directly to the Velux frame using a high-quality adhesive flashing band.
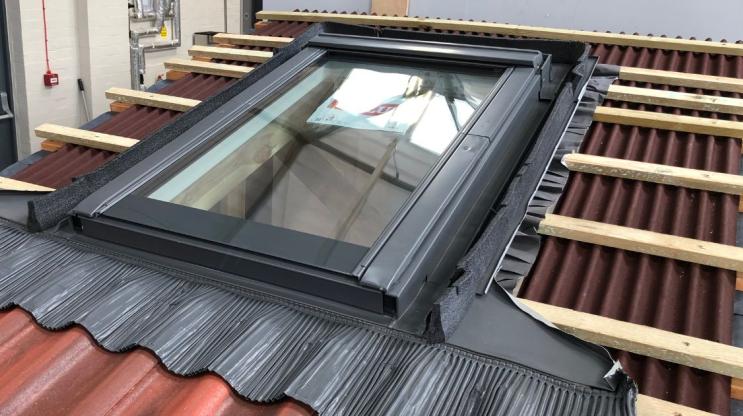
Tile Level (Second Line of Defence): Install a standard Velux tile flashing kit (chosen specifically to match the profile of your roof tile) to weather the window at the external tile layer.
3. Fixing & Membrane Protection
When securing the components on site, ensuring you do not damage underlying layers is crucial:
Fixing Length: Use 75mm fixings for your batten setup. This specific length provides structural security without penetrating or compromising the existing breather felt membrane underneath.
Full technical details
For comprehensive visual guidance, step-by-step walkthroughs, and weathering details across all sections (including the verge areas), refer to the official Onduline resources:
Onduline ISOLINE LOW LINE Project Pack Onduline Installation Video Gallery