
Onduline Classic Installation
The original bitumen corrugated sheet for roofing

Simple guide for an efficient sheet roofing installation
Corrugated sheet roofing systems have been a popular choice for a wide range of applications for many years. From garages, summer houses and sheds, to industrial and agricultural buildings, this solution is a firm favourite with roofing professionals based on its ease of installation and the versatility, longevity and performance. Here, Greg Hissey, Technical Sales Manager at Onduline Building Products, outlines the simple steps to help installers with an efficient installation.
There are a number of reasons why corrugated roofing sheets are such a popular choice with roofing professionals. Firstly, they are incredibly easy to work with. Not only do installers like the fact that this solution is really simple to install - saving them valuable time and money, but the material is so well suited to such a wide range of projects and applications that its versatility is welcomed up and down the country.
The product is also strong and durable, but extremely lightweight when compared to other roofing materials as well. This means it can withstand the harshest of weather conditions, whilst also being easy to handle and transport, so it doesn’t add much weight to an overall building structure once installed.
Benefits of corrugated sheets
There are a number of benefits that make corrugated roof sheets an attractive proposition for your end-user customers too, whether this is a homeowner looking to replace their garage roof, or a commercial building owner developing an industrial facility.
The fact that corrugated roofing is corrosion resistant, so it’s not prone to rust, is a major selling point. Add this to the longevity of the solution, which can last for 30-50 years when looked after and maintained’, and you can see why the whole life cost of this type of roofing system, when compared to other options on the market that may only last 15 to 20 years, is an easy product for roofers to sell to their customers.
The trend for innovative and sustainable building solutions is also driving demand for corrugated roofing systems. Onduline’s roofing sheets for example are made from 50% to 60% of recycled materials, making them the ideal choice for environmentally conscious consumers. The product also reflects the sun, meaning a building will stay cool in the summer and maintain heat in the winter, helping to save energy and reduce heating costs.
Installation guide
Whilst corrugated roofing systems are renowned for being simple to install, mistakes can still happen, and we do get a number of calls to Onduline’s technical team where installers need some installation guidance or advice.
Generally, the most common issues we encounter are linked to sheets that may have been fitted the wrong way round, or where the incorrect nails might have been used. This step-by-step installation guide for Onduline’s Classic roofing solution is specifically designed to help installers with an efficient installation.
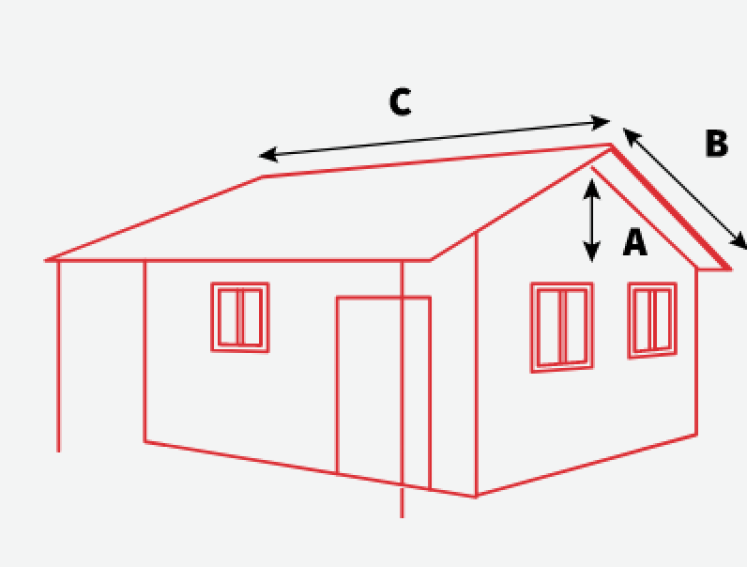
Step 1: measure the slope of your roof
For roof slopes greater than 15 degrees (1 in 4 gradient or higher) purlins should be fixed at maximum centres of 61cm. At the eaves, allow for a 50cm sheet overhang when positioning the first purlin from the eaves. Lay the sheets (single corrugation side lap) with a 17cm sheet end lap and use 20 nails or screws per sheet.
Different types of roofs
Option 1
For roof slopes greater than 15 degrees (1 in 4 gradient or higher) purlins should be fixed at maximum centres of 61cm. At the eaves, allow for a 50cm sheet overhang when positioning the first purlin from the eaves. Lay the sheets (single corrugation side lap) with a 17cm sheet end lap and use 20 nails or screws per sheet.
Option 2
For roof slopes between 10-15 degrees (1 in 6 to 1 in 4 gradient), purlins should be fixed at a maximum of 45cm with the same overhang as option 1 above. Lay the sheets (single corrugation side lap) with a 20cm sheet end lap and use 20 nails or screws per sheet.
Option 3
For roof slopes between 5-10 degrees (1 in 11 to 1 in 6 gradient), a fully supporting roof deck should be laid (20mm minimum), with the same overhang as option 1 and 2. Lay the sheets (double corrugation side lap) with a 30cm sheet end lap and 20 nails or screws per sheet.
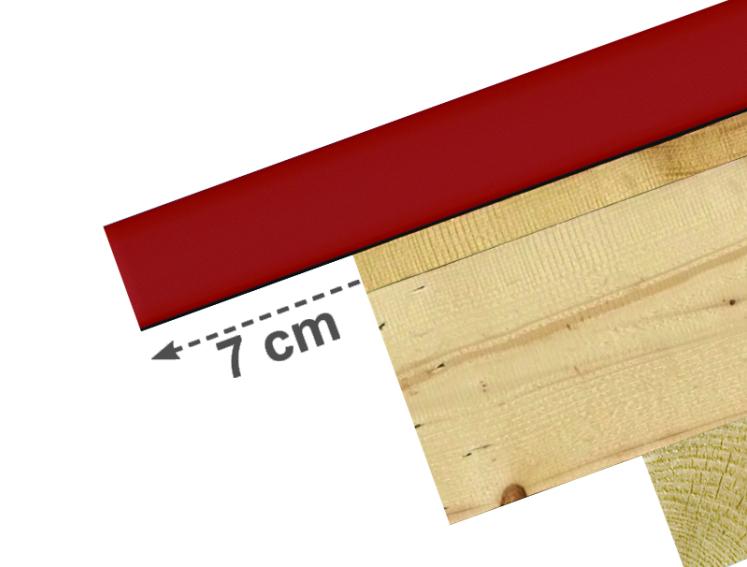
Step 2: laying the sheets
Start laying sheets in runs in the opposite direction to any prevailing winds (to prevent side laps facing the wind and water ingress) and over the gutter line with a max 7cm overhang.
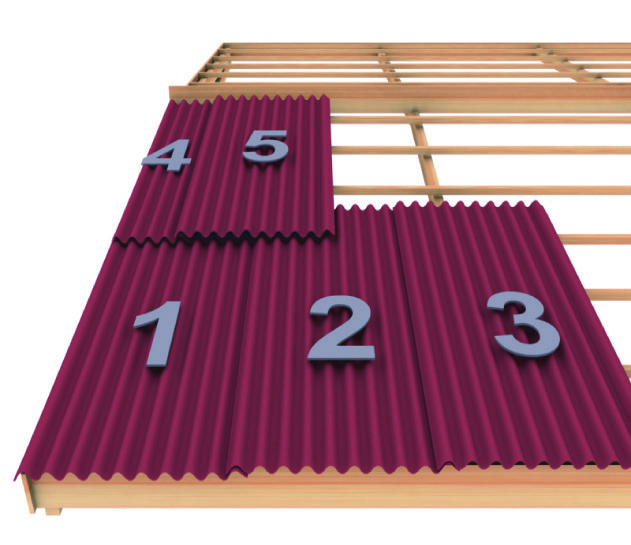
The second row has to be started with half a sheet cut parallel to the corrugations, to misalign side overlaps. Adjacent runs should overlap each other by at least 25cm.
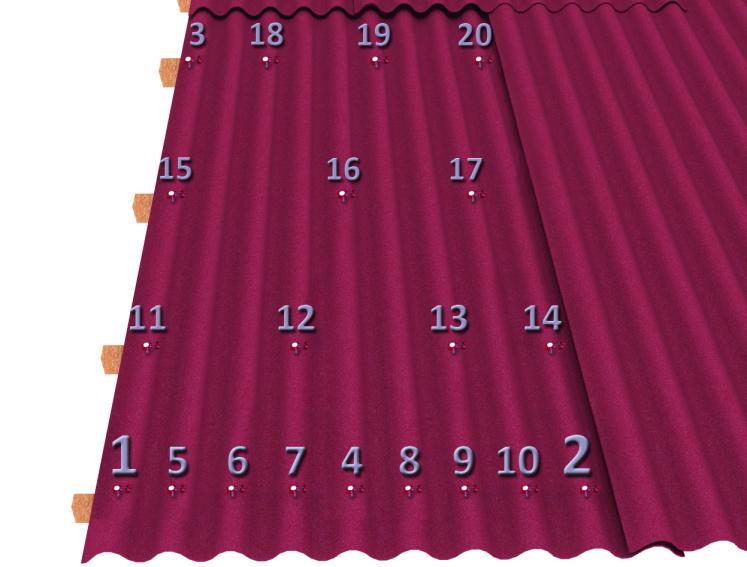
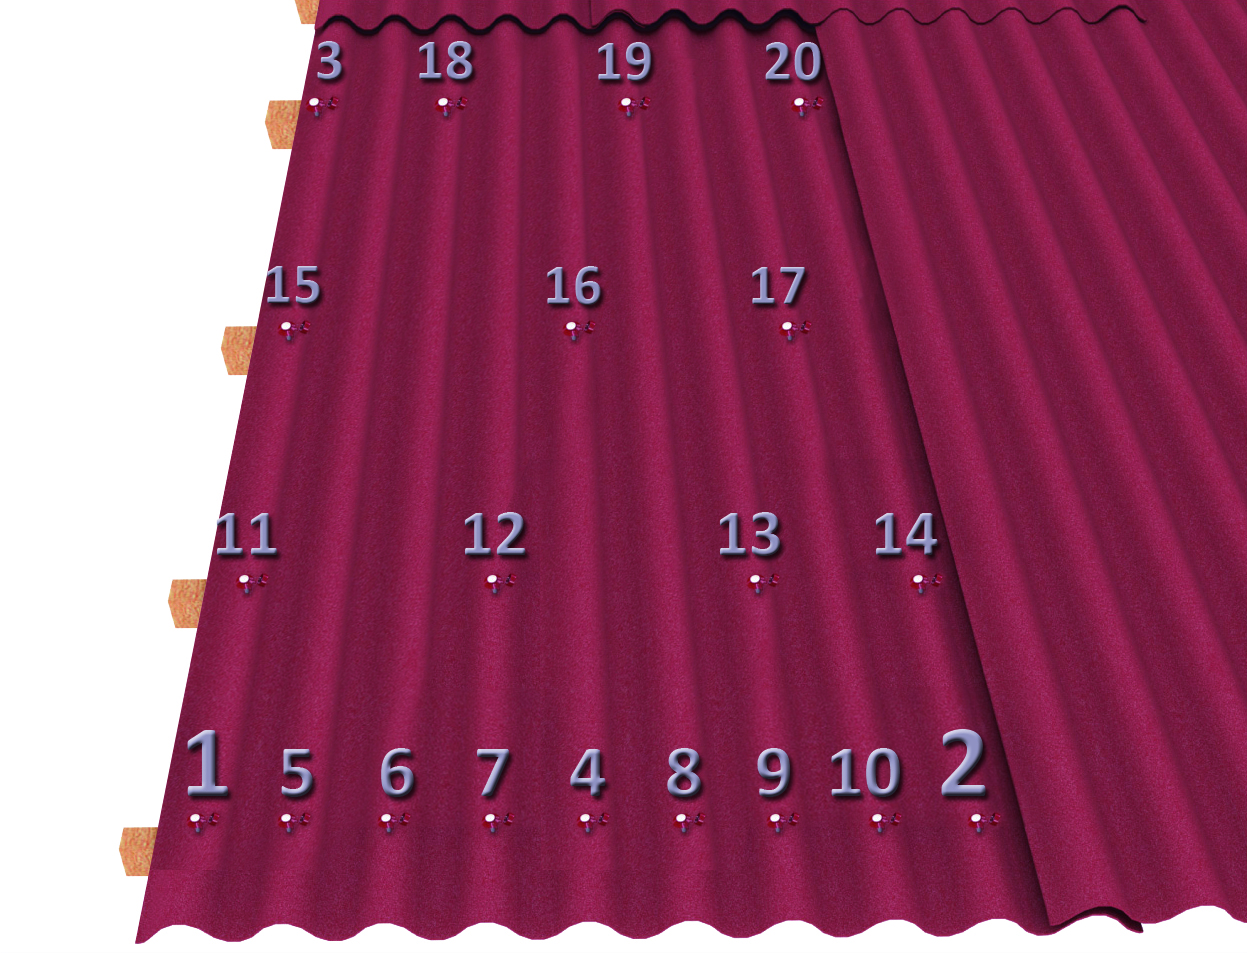
Step 3: fixing the sheets to purlins
The fixings used to attach sheets to purlins must be durable and able to withstand the most extreme weather conditions. We recommend using Onduline plastic PP monobloc or Safetop nails, or Onduline Universal screws.
Approximately 20 fixings should be used per sheet, with every corrugation fixed at eaves, overlaps and ridges. Every second corrugation has to be fixed at the intermediate purlins. The fixing at the intermediate purlins has to be staggered.
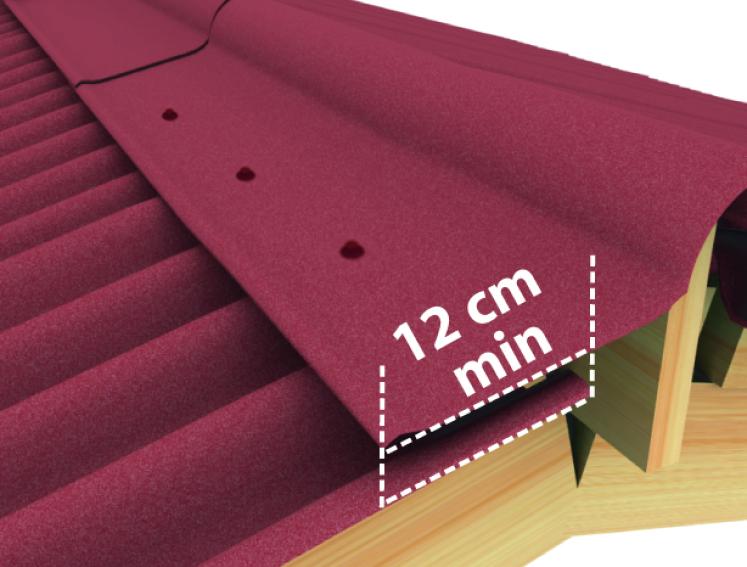
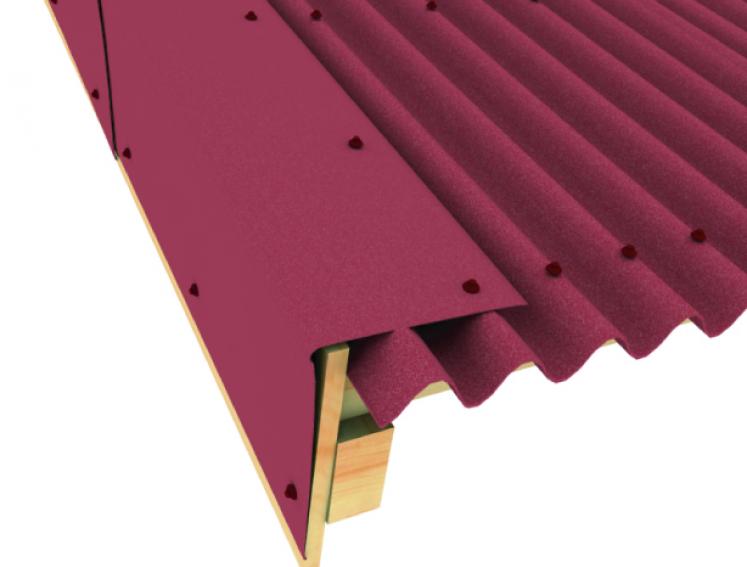
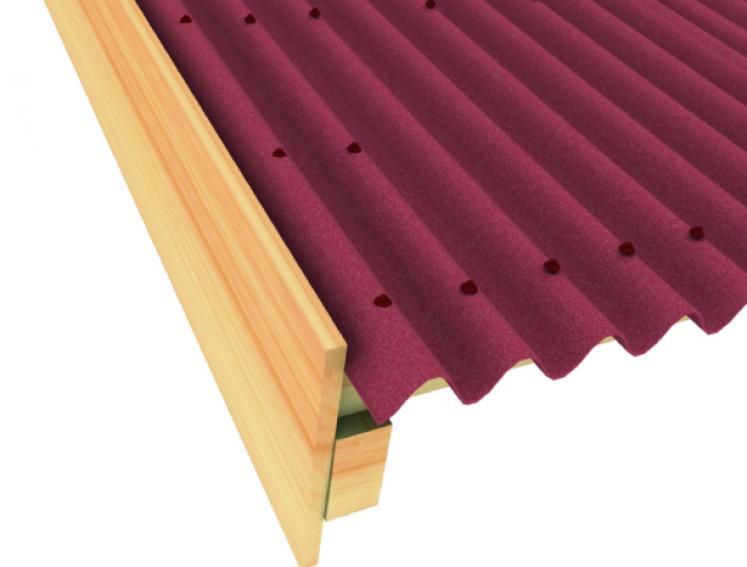
Step 4: verge and ridge elements
To optimise aesthetic appeal as well as providing waterproofing and wind uplift resistance, use a verge element. Fix it first into the sidewall, then on the top of the corrugation. The ridge element has to overlap the sheet by a minimum of 12 cm.
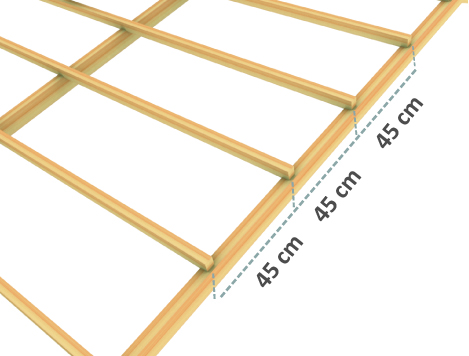
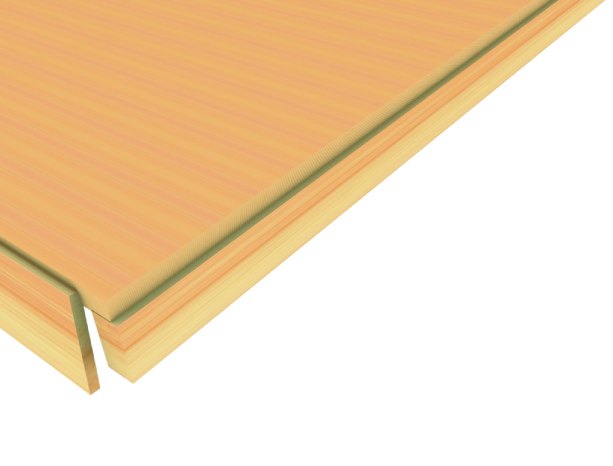
Step 5: roof support
The roof pitch and occasional load (especially wind and snow) determine the distance between the battens. The maximum distance in any case is 45 cm.
Market leader in bitumen roofing systems
As the market leader in bitumen roofing systems, Onduline is with installers every step of the way to help make the installation process as simple and straightforward as possible. From high performance and lightweight roofing systems in a range of colours to suit any application, to Onduline’s expert technical team on-hand to support customers, the company offers a range of market leading products, backed up with a first class service offering.
ONDULINE CLASSIC installation for professionals.