Check to see if your outdoor building manufacturer has installed our Onduline roofing sheets correctly with this guide!
If you have recently purchased an outdoor building, such as a shed or stables, with Onduline roofing already installed, you may be wondering whether the manufacturer has fixed the Onduline roofing sheets correctly. The last thing you want is for the roofing on your new outdoor building to leak or sag and for you to have to replace it so we have some handy checks to help you make sure everything is all okay. Let’s take a look…
What Onduline roofing has been used?
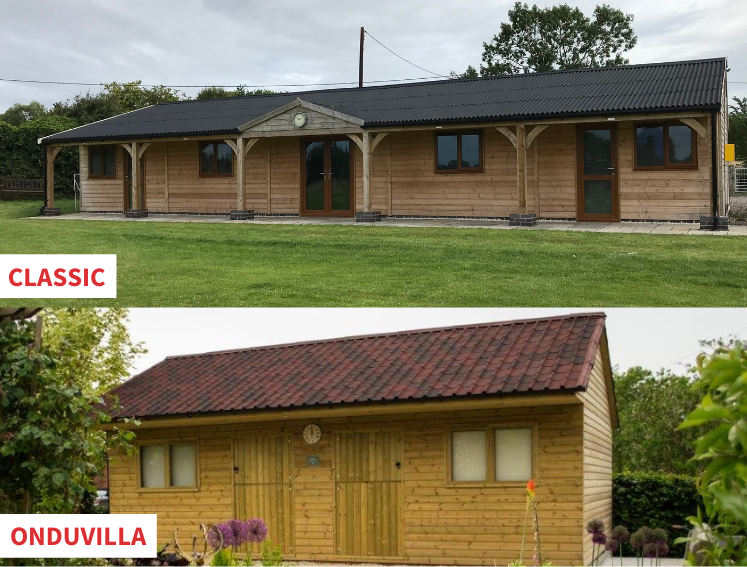
ONDULINE CLASSIC, ONDUVILLA Tile Strip or...
Does your outdoor building have ONDULINE CLASSIC sheets or maybe even ONDUVILLA tile strips? The style of the Onduline sheets will make a difference on how they need to be installed so double-check which roofing sheets have been installed on your roof before moving on to the other checks.
Your roof’s pitch
The pitch of your outdoor building's roof will have a big impact on how the Onduline roofing sheets should be installed too so it’s worth making note of this before continuing through the other checks.
Your outdoor building’s roof support structure
What you are looking for here is whether your roof’s support structure uses deck boards or purlins. You should be able to easily see which of these it has as with purlins you’re likely to be able to see the underside of the Onduline roofing sheets, whereas with deck boards you will be able to see those.
My roof’s support structure uses purlins…
Whilst checking, if you notice it has purlins, measure the distance between these as if your purlins are too far apart this could cause your new roofing to sag over time. For a roof fitted with ONDULINE CLASSIC sheets:
- If your roof pitch is over 15 degrees (over 27%) your purlins should be no further than 61 cm apart
- If your roof pitch is between 10 and 15 degrees (17 - 27%) your purlins should be no further than 45 cm apart
If your roof pitch is between 5 and 10 degrees (9 - 17%) then your outdoor building should have a full deck using deck boards. If your manufacturer has used purlins instead, it is best to get in touch with them to see how they can correct this as it is likely your Onduline roofing sheets will need repairing or replacing over time due to the incorrect supporting structure.
In what direction has your roofing been installed?
There is a right and a wrong way!
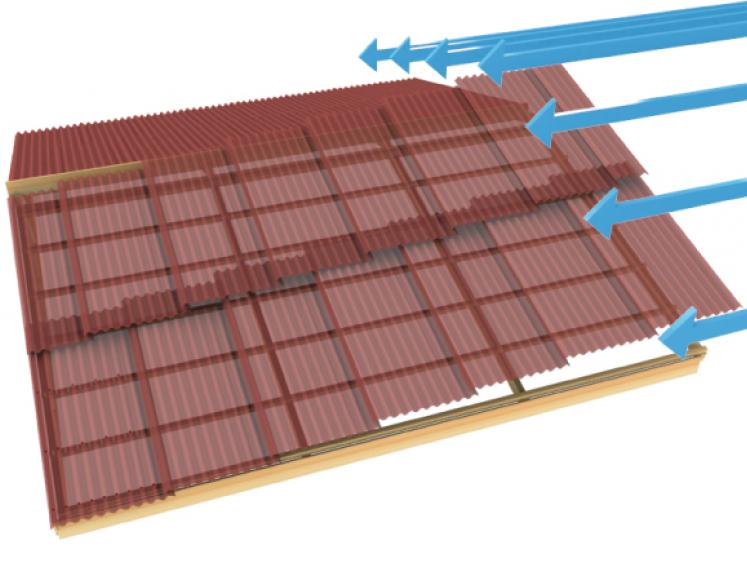
The corrugation of your roofing should be installed so any rain water can easily run down and off your roof - it should be running downwards (vertically) and not sideways (horizontally). Also, your roofing sheets should have been installed in the opposite direction from the prevailing winds so wind cannot get underneath the sheet and lift it.
Overhangs and overlaps
Whilst laying the Onduline sheets your stable, shed or other outdoor building manufacturer should have adhered to our overhanging and overlapping rules. This is where knowing your roof’s support structure and pitch will help with your checks.
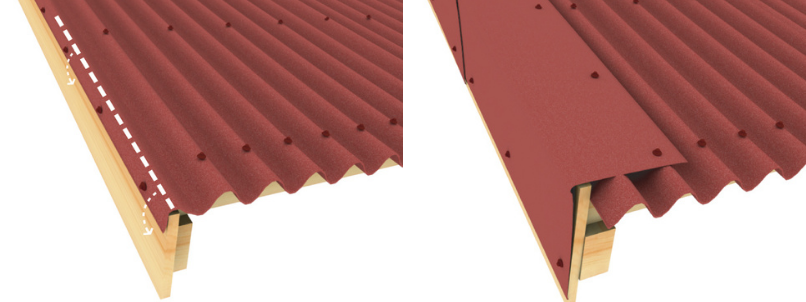
Overhangs for CLASSIC and ONDUVILLA .
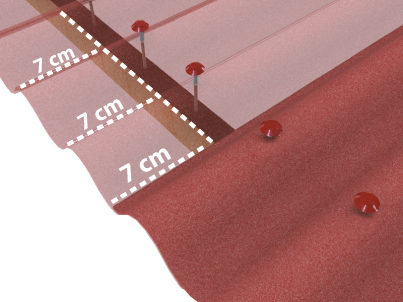
For all types of roof support structures and pitches using ONDULINE CLASSIC sheets, your overhang at the eaves (the bottom) needs to be 7 cm. For all types of roof support structures and pitches using ONDUVILLA tile strips, your overhang at the eaves needs to be 5 cm. This is to help prevent wind driven rain.
Overlaps for CLASSIC and ONDUVILLA
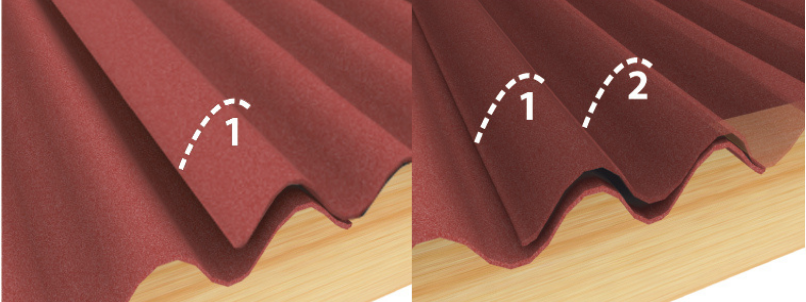
For roofs with purlins using ONDULINE CLASSIC sheets, the minimum side overlap of your sheets should be one corrugation. For a roof with a full deck using ONDULINE CLASSIC sheets, the minimum side overlap of your sheets should be two corrugations.
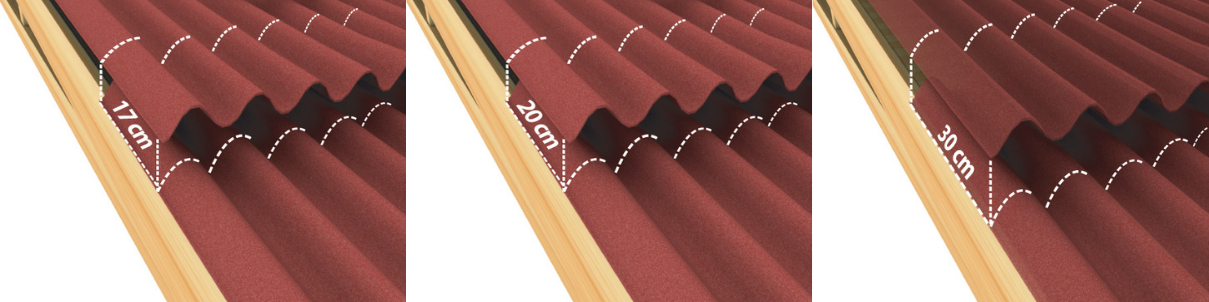
The minimum end overlaps of your ONDULINE CLASSIC sheets should be as follows:
- For roofs with purlins and a pitch over 15 degrees, the end overlap of each sheet should be a minimum of 17 cm
- For roofs with purlins and a pitch between 10 and 15 degrees, the end overlap of each sheet should be a minimum of 20 cm
- For roofs with a full deck and a pitch between 5 and 10 degrees, the end overlap of each sheet should be a minimum of 30 cm
The overlaps for our ONDUVILLA tile strips are slightly different. For all roof support structures and pitches, the side overlap of your tile strip should be one corrugation. For the end overlaps, our ONDUVILLA tile strips have raised guidelines on both ends so the guideline on the top tile strip interlocks with the guidelines on the bottom tile strip to create the correct overlap.
If any of your sheets do not meet the overhang or overlap rules, your outdoor building may not be fully protected from wind driven rain and other weather so it is worth contacting the manufacturer to see how they can rectify this.
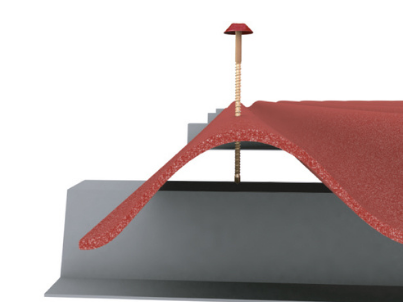
Fixings
No matter whether the manufacturer has used screws or nails to fix your Onduline roofing sheets, these should be fixed at the top of the corrugation (the hump) and not the bottom (the dip).
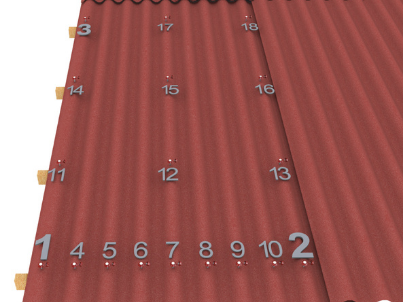
If your outdoor building has been fitted with ONDULINE CLASSIC roofing sheets, there should be a fixing on every corrugation at the eaves (the bottom edge of the roof sheet) and the ridge (top edge of the roof sheet) - you should have a separate ridge piece fitted at the very top of your roof so the fixing is likely to be going through this and then the corrugation at the ridge. There should also be further fixings on every other corrugation in between the eaves and ridge, which should be evenly spaced. If your roof’s support structure uses purlins, these in between fixings should be secured to the purlins. Lastly, where one sheet overhangs another, there should also be a fixing securing this at the eaves, ridge and in between points.
If your outdoor building has been fitted with Onduline’s ONDUVILLA tile strips, these are slightly different and need a fixing at every corrugation for every tile strip, no matter whether that is at the eaves, ridge, in between points or overhang.
Edges aka Verges
The edges, also known as verges, of your outdoor building’s Onduline roof cannot be left exposed i.e. with the sheets just hanging over the edge/verge as this will allow for rain and wind to get underneath the sheets. Therefore, if it looks like your roof is exposed, it is definitely worth contacting your manufacturer.
A correctly installed Onduline roof with finished edges/verges will either have the edge of the sheet folded down and nailed to the edge or will be fitted with a ridge or verge unit. When fitting the ridge or verge units to the edges, these should be installed bottom up so rainwater flows down without getting caught underneath, causing leaks.
Ridges
As we have mentioned, your outdoor building should have ridge pieces fitted at the ridge, the peak of your roof. As with your sheets, these should be fitted at the opposite end from prevailing winds so they do not lift. The ridge piece should overlap your ONDULINE CLASSIC sheet by a minimum of 12 cm and be fixed at each corrugation. There should also be a 12.5 cm minimum overlap between each ridge piece. An additional timber batten (or metal structure) is also required to sit underneath the ridge, in the middle, to offer extra support. You should be able to tell if your roof has ridge support by checking from inside your building.

At each end of your roof’s ridge, a ridge cap should have ideally been installed to not only finish the overall look but also to stop rain and wind from getting underneath your end ridge piece.
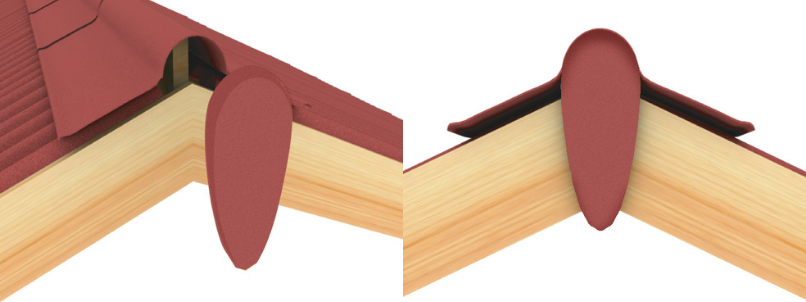
Hip detail
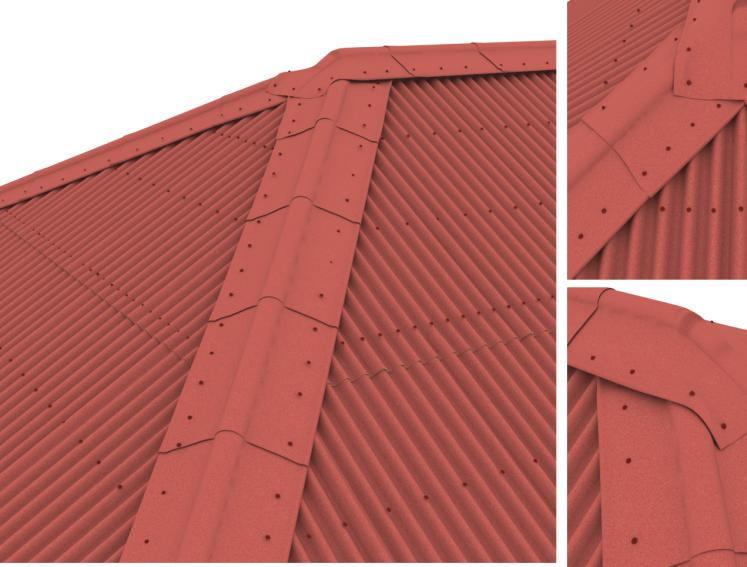
For rather large roofs
If you have a rather large outdoor building it is likely your roof has four or more sides to it and therefore it will also have a hip detail. To make sure this has been installed correctly, the hip should have been fixed first from bottom to top so the rainwater flows down the hip detail without getting caught underneath. Then the ridge pieces should have been fitted afterwards
We hope these checks help you to see if your Onduline roofing has been installed correctly. If you have any questions or need any further advice our team will be happy to help. You can contact us by calling 0207 727 0533 or emailing [email protected].
Discover the full range at onduline.co.uk.