Onduline has recently launched its new and unique under roof system, ISOLINE LOWLINE - the only system in the UK to be BRE tested and BBA Accredited to as low as 10 degrees.

Watertight solution for low pitched roofing
Here, Greg Hissey, Technical Sales Manager for Onduline Building Products, explains how Onduline’s ‘roof below a roof’ system can help contractors achieve an aesthetically pleasing tiled look, while ensuring a low pitch, of down to 10 degrees, is watertight.
Designed specifically for use on low pitch roofs, this lightweight bituminous underlay sheeting has been rigorously tested and is proven to be at least three times less likely to leak compared to a traditional tile system.
With a corrugation height of just 24mm, ISOLINE LOWLINE is fixed below the tile or slate roof covering, acting as the primary waterproofing layer of a roof. Thus, making roof tiles a secondary line of defence enabling the pitch of the roof to be much lower than the minimum as recommended by the tile manufacturer.
Not only does this help to meet the demand for maximising living space, as the low pitch means the roof void can be minimised, it also enables traditional tiles to be used in situations where they wouldn’t have been able to be utilised previously, such as extensions or large roofing projects, greatly enhancing the aesthetic quality of a property.
Preparation
There are three main types of roof structure ISOLINE LOWLINE can be installed on:
- Battened
- Full deck
- Warm roof
Installation of the lightweight panels is straightforward and no specialist tools are required. For PPE, wear safety gloves, goggles and a safety hat. Always make sure you are working from a secure platform and follow all HSE rules for working at height.
Fixing Tiles and Slates
Note: The system is designed to allow tiles and slates to be laid below the manufacturer’s minimum recommended roof pitch. In all other respects the manufacturer’s fixing specifications must be adhered to utilising enhanced fixings as required to counter increased wind uplift.
1. Installation guide for battened roofs
The first thing to do is prepare the roof eaves detail to suit the roof pitch, this is constructed by incorporating a fascia board, a tilting fillet and an eaves tray support board where required. The eaves tray can then be installed and fixed to the roof structure.
When using a membrane, such as ONDUTISS AIR, this should be laid next. Lay the membrane in between the rafters with a slight drape (max. 15mm is recommended) and on top of the eaves tray with a minimum overlap of 100mm between the two. Ensure the membrane is not exposed or carried on past the top fascia board.
The support battens are then installed using the tile gauge (distance between battens) as per the tile manufacturer’s recommendation. Support battens should be a minimum of 50mm x 38mm in size and mechanically fixed to rafters.
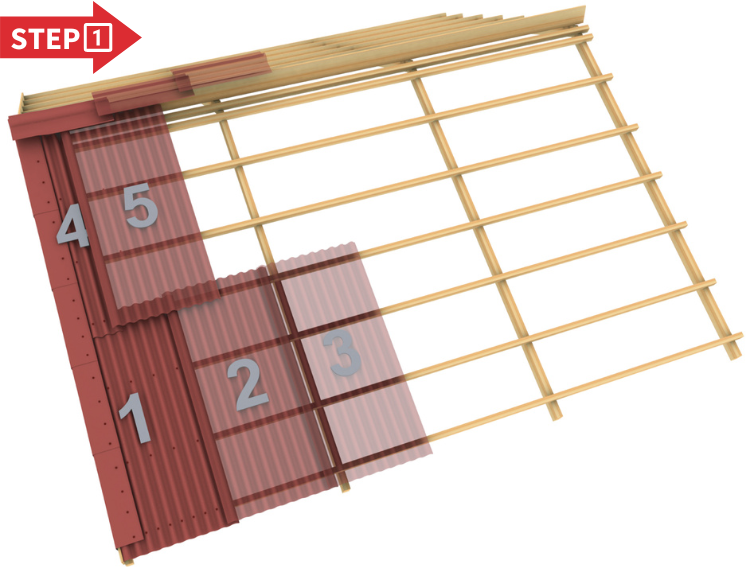
The ISOLINE LOWLINE sheets can then be installed. Starting at the bottom of the roof, lay a row of sheets using the eaves line to align the sheets in parallel to the fascia board. For ease of use, each sheet incorporates two horizontally embossed overlapping guidelines. Overlap the sheets horizontally by two guide lines (approximately 210mm). For vertical overlap use two corrugations (approximately 100mm).

Similar to tiling, the sheets must be staggered
Similar to tiling, the sheets must be staggered
Similar to tiling, the sheets must be staggered. Start the second row up and every other alternate course with the sheet cut in half vertically to create a broken bond sheet pattern. Tiling battens can then be laid on top of the ISOLINE sheets and aligned with the support battens. Use suitable nails or screws to fix the system together.
A smooth shank fixing is recommended with a minimum head diameter of 3.5mm. Fixings must only penetrate the sheets at the apex of the corrugation and must be used at approximately every 300mm along the length of the tiling batten. Any fixing used must penetrate the support battens by a minimum of 15mm.
Then fix the ventilator comb between the eaves battens and finish by overlaying eaves battens with a batten cloaking piece. Use deep flow guttering to reduce the risk of rainwater over-shooting.
2. Installation guide for a fully boarded roof
Use timber decking (minimum 20mm) to fully board the area. Eaves trays should then be installed and fixed to the boards. If you’re using a membrane, such as ONDUTISS AIR, this should be laid next. Lay the membrane on top of the eaves tray with a minimum overlap of 100mm between the two. Ensure the membrane is not carried on past the top fascia board edge.
Follow the installation instructions as outlined above for a battened roof.

3. Installation guide for a warm roof
ISOLINE LOW LINE can be installed above a warm roof, providing the appropriate fixings and ONDUTISS vapour permeable membrane is used. Adequate ventilation must be incorporated in the system.
Note: Our secondary roofing system forms a cold roof, it cannot form an integral part of a warm roof section but can be installed above it.

Verges / Ridges / Hips / Side and End Wall Abutment details
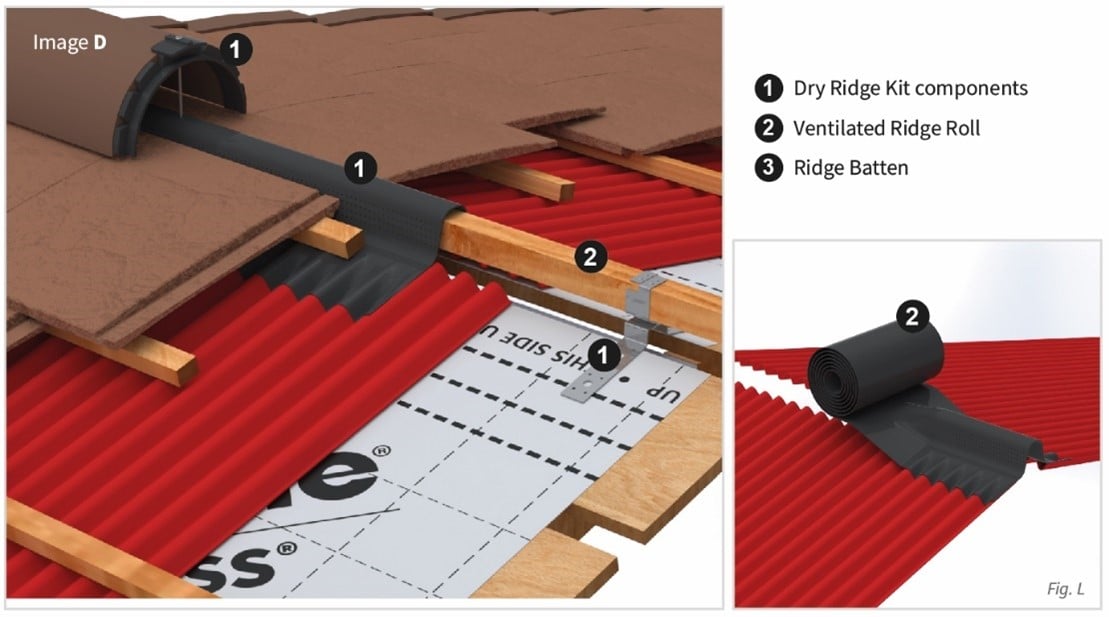
At ridges and hips lay roofing membrane across the butt joint in the sheets and dress down a minimum of 300mm either side of the ridge. When using ventilation products, the membrane can be trimmed instead at the ridge level to allow the flow of air.
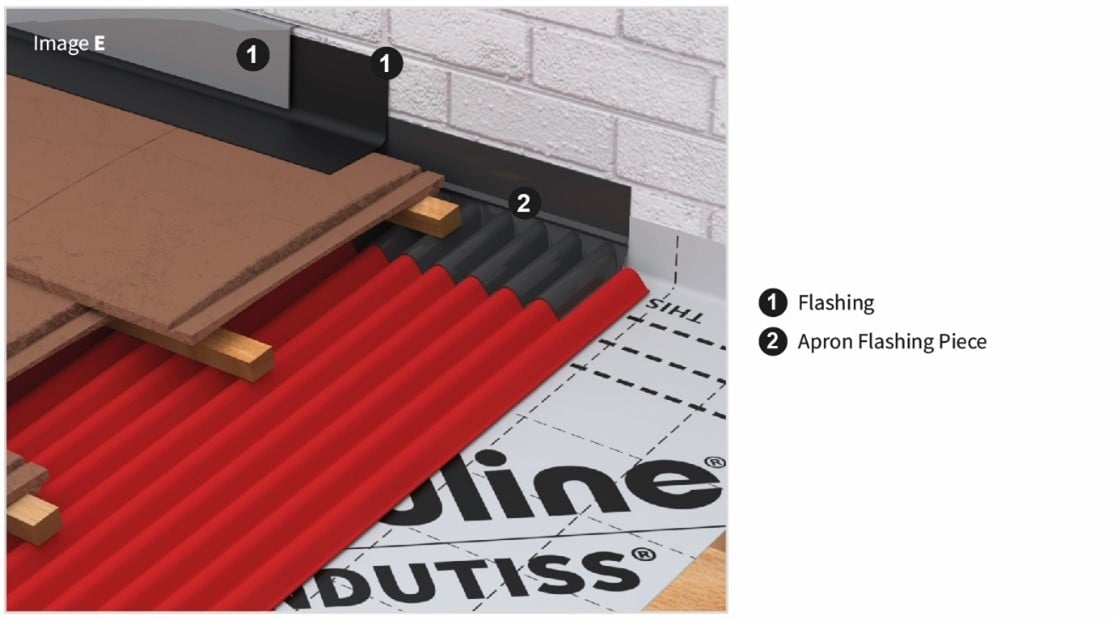
For side wall abutments use a conventional 2-3 layer waterproofing system as shown on the image above. Note: the top-most flashing layer must be chased into the wall.
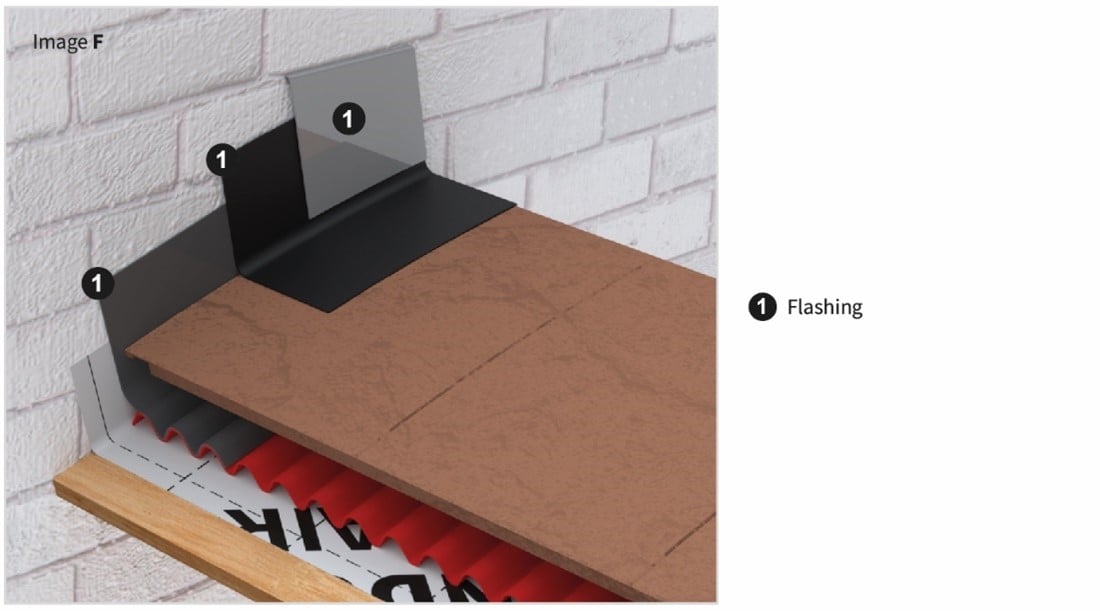
For the end wall abutment, fold the roofing membrane upwards on to the wall (approx. 100mm). Install Onduline Apron Flashing Piece. The tile battens and tiles can then be fixed and a two-part lead flashing can be applied. Abutment ventilators can also be used.