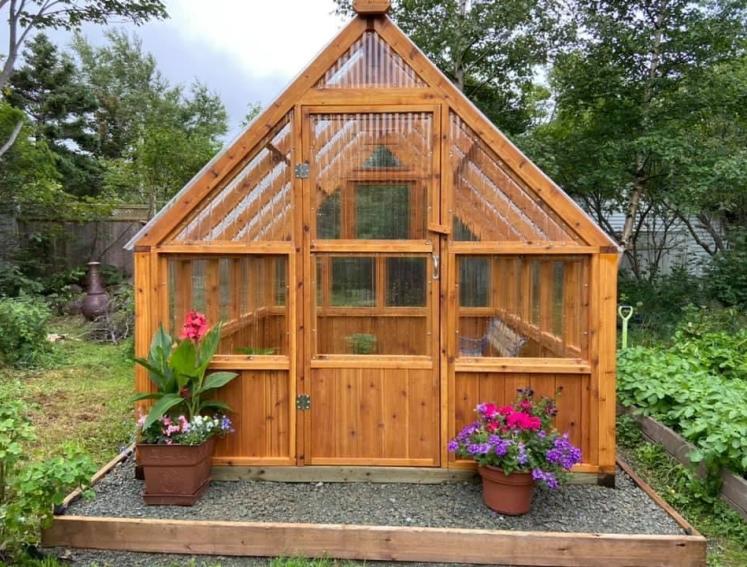
Want to build your own greenhouse? We're here to help with some inspiration and a step-by-step guide!
No matter what the time of year, a greenhouse is perfect for growing plants, fruits and vegetables! Whether you use it for just the initial growing from a seed to seedling before planting in your garden, or for the full length of the growing season because of unpredictable weather, a greenhouse is bound to be your new favourite place to be.
Greenhouse needs
Before you go ahead and build your new greenhouse, there are some things to consider…
- What materials you will need - timber or aluminium? Plastic or glass?
- What tools you will need - drill, hammer
- What type of plants you will grow in it
- How tall it needs to be - you’ll want plenty of height for tall plants
- How wide it needs to be - you’ll want plenty of space to move around and to move plants around too
- Where in your garden is the best place for sunlight all year round but still gets some shade in those hotter summer months?
- Where in your garden could you put your greenhouse so you can access all sides of it from the outside? You will need to keep it well maintained
There are two materials that are mostly chosen for the structure of a greenhouse, wood/timber and aluminium. For the purpose of this DIY guide, we will be choosing wood/timber as this tends to be more DIY friendly.
A step-by-step guide to building your own timber greenhouse
Get your tools ready!
- You’ll want to prepare the area you have selected as being the best for sunlight all year round so it is flat and has good drainage. Then cut base timbers to your preferred size, arrange them so they are flat on the ground to create a rectangle, and secure them together with timber screws
- Next you need to secure your timber frame base to the ground. How you do this will depend on what type of ground you are putting your greenhouse on. For soil and grass areas, you can use metal spikes, as you would with a shed, hammering these into the ground on the inside of your timber frame at each corner, securing them to the timber frame with screws. If you are fixing your greenhouse on top of concrete or paving slabs, you’ll need l-shaped brackets and bolts suitable for concrete or paving
- Now you're ready to assemble the side walls. You’ll need to create two rectangular frames for each side of your greenhouse, making sure they're the same width and the correct height to give you enough room for your tall plants to grow - remember you will be installing a pitched roof so a lot of your greenhouse's height will come from this too! You’ll need to install lengths of timber (studs) within the frame equally spaced apart and once your side walls are complete, you then need to secure them to your base with those handy screws.
Now for the end walls...
- Now for the end walls...you’ll need to fit a length of timber on top of your base frame and in between your side walls at each end of your greenhouse, these are called sole plates, as this is what you’ll secure your support posts to. Cut your two support posts to the correct length - this is what will determine the height of your greenhouse so make sure they are tall enough - and secure one in the middle of each end of your greenhouse frame, using screws driven at an angle. Note: your front post will be cut later for your door!
- Check your support posts are level and then it’s time to install your ridge posts on top. To help keep everything secure whilst installing your pitched roof, you can secure temporary cross braces - spare pieces of timber - between the side wall and the support posts and a lower height
- For ease, create a template rafter (a timber piece that will form part of your pitched roof) so you can cut all your roof pieces (rafters) based on this template. Do this by cutting a timber length slightly longer than needed and hold it against the edge of the ridge and side wall, tracing along the face of the ridge and the side wall to mark your cutting lines. Cut, test the fit and make any adjustments needed before cutting all off your rafters. You will need enough rafters to match the same number of timber lengths (studs) in each of your side walls as well as the ones needed for the outer edges. Install your rafters using screws driven at an angle once again
- Now for the door! Make two side lengths by holding one up and tracing along the bottom edge of the rafter above to create your cutting line - each door length should sit under the bottom of the rafter, not on it. Cut to length, and use this as a template to cut your second door side, and then secure both door sides with screws at an angle. Complete your door with a support post that will fit in between the two door sides, creating the top of your door frame. Before securing it, cut the original support post at the correct height and remove the bottom portion no longer needed. Screw your new door piece (the header) to the part of the support post that is left, and to each of the door sides with screws
- Don’t forget, secure two more timber lengths (studs) at the back of your greenhouse for extra stability.
And you’re done! (Almost)
Greenhouse covering!
What is best?
Once your timber structure is built, it’s time to decide on what to cover your greenhouse with. You will need a material that lets the light in but not too much light. You’ll also want one that can be easily maintained and cleaned, and one that is watertight and durable, especially with the unpredictable UK weather!
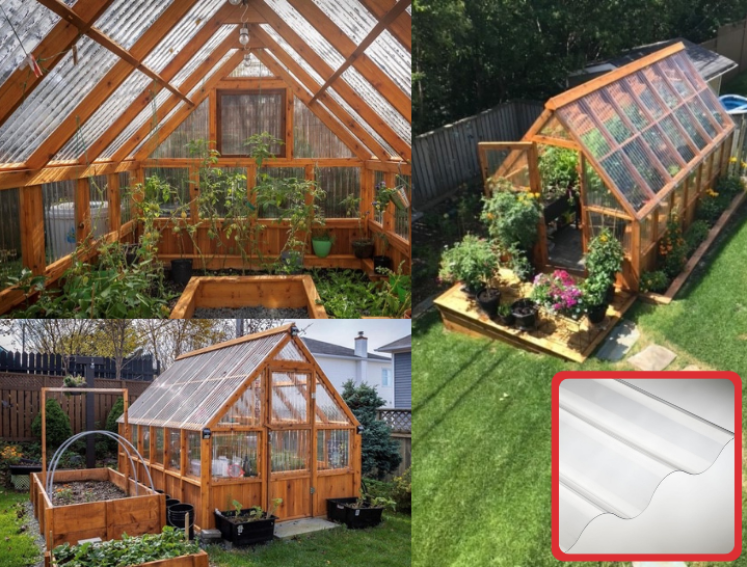
Our ONDUCLAIR PC sheets might be just what you are looking for...they’re easy-to-install, are lightweight but durable, fire-resistant, and offer great light transmission properties but without harsh light exposure - perfect for light-vulnerable crops. They’re also super easy to clean, reduce heat loss during the night and come with a 10-year guarantee! What more could you ask for?
We also have our ONDUCLAIR PVC sheets which have similar benefits to our ONDUCLAIR PC sheets but they also offer anti-UV protection to help protect you from the sun's rays when you’re pottering in your new greenhouse.
Ready to start your DIY greenhouse project? Our lightweight and easy-to-install clear sheets can be purchased via our eShop and Wickes.
Discover the full range at onduline.co.uk.