
How to integrate a roof window with ISOLINE LOW LINE?
Roof Window: Creating a watertight seal
Integrating a roof window into an ISOLINE LOW LINE sub-roof roof requires careful attention to your roof pitch and a "double weathering" technique to guarantee a completely watertight seal.
Follow these guidelines for a successful installation:
1. Check Your Roof Pitch Requirements
Your choice of window depends entirely on the angle of your roof:
- Pitches between 10° and 10°: You must use a specific low-pitch roof window model engineered to operate safely at low angles.
- Pitches 15° and above: You have the flexibility to use standard roof window models.
2. Implement Double Weathering Around the Frame
To ensure absolute water tightness, you need to achieve "double weathering" by sealing the window at both the sub-roof (Isoline) level and the external tile level:
- Sub-Roof Level (First Line of Defence): Use an ONDULINE APRON PIECE positioned at the top of the roof window Seal the ISOLINE LOW LINE sheets directly to the roof window frame using a high-quality adhesive flashing band.
- Tile Level (Second Line of Defence): Install a standard tile flashing kit (chosen specifically to match the profile of your roof tile) to weather the window at the external tile layer.
3. Fixing & Membrane Protection
When securing the components on site, ensuring you do not damage underlying layers is crucial:
- Fixing Length: Use 75mm fixings for your batten setup. This specific length provides structural security without penetrating or compromising the existing breather felt membrane underneath.
ISOLINE LOW LINE SKYLIGHT INTEGRATION
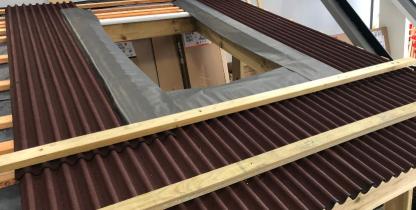
Lay ISOLINE® LOW LINE sheets up to the edge of the roof window aperture. Next, apply an adhesive flashing band around three sides (the bottom and two sides) of the opening. Ensure the flashing extends across a minimum of three corrugations laterally and at least 150mm below the bottom edge. Use a wide enough band so it can be dressed up against the inner frame of the roof window.
ISOLINE LOW LINE SKYLIGHT INTEGRATION
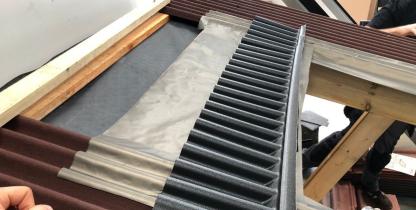
At the top of the aperture, lay the flashing band over the installed ISOLINE® LOW LINE, maintaining a minimum three-corrugation side lap and leaving enough material to dress up against the inner frame. Next, fit the ISOLINE® APRON FLASHING. Finally, cover the entire top section with the overlapping ISOLINE® LOW LINE sheet.
ISOLINE LOW LINE SKYLIGHT INTEGRATION
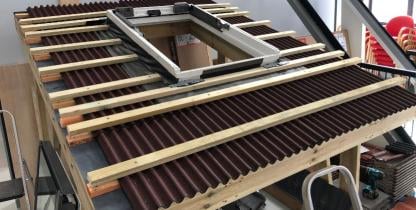
Now install the roof window inner frame, ensuring the flashing band around all four edges is dressed smoothly up against the side of the frame.
ISOLINE LOW LINE SKYLIGHT INTEGRATION
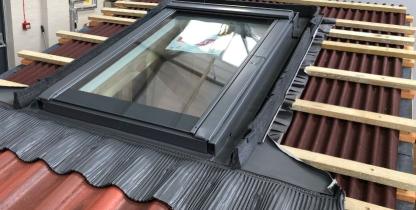
You can now install the roof window flashing kit, ensuring it is compatible with your chosen roof tiles. Finally, fit the roof window into place.
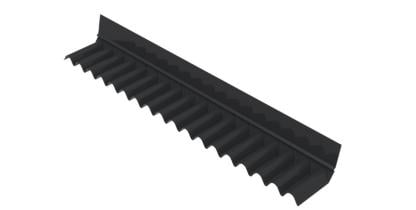
ISOLINE LOW LINE APRON FLASHING
Dimensions: 930 mm (L) x 80 mm (H) x 190 mm (W)
Weight: 0.35 kg
Material: Heavy-duty Polypropylene (PPE)
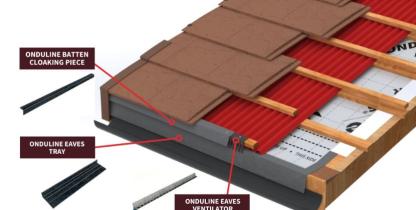
ISOLINE LOW LINE Accessories
Explore the complete accessory range for total, leak-free waterproofing with the ISOLINE LOW LINE system
Download ISOLINE LOW LINE Technical Resources
Get instant access to Technical Data Sheets, CAD files, installation guides, and the full Project Pack on the official resource hub.
