INSTALLING BARDOLINE ROOF SHINGLES
Installing roof shingles is fast. The roof shingles are easy to transport: their packaging and their low weight facilitates handling and storage. They are installed on a full deck. Cutting roof shingles is simple with a cutter.
You have at your disposal a wide range of BARDOLINE bituminous shingles qualities, colours and forms to satisfy the needs of your customers.
Installing roof shingle is easy with standard tools:
- Tools:
- Hammer
- Cutter
- Meter
- Level.
- Accessories:
- Large headed galvanised nails
- Mastic sealant
Installing roof shingles step by step
Good to know:
- A full deck, like OSB, is needed to install shingles.
- Install shingles starting from the eave.
- Cut the shingles on the back of the granulated face.
- Installing roof shingles varies according to the slope and the climatic zone of the project. Call us to find out what the constraints of your project are.
Prepare installation
- Check the structure so that it is perfectly flat - an irregularity is unattractive and can cause infiltration
- Seal by covering the roof with Ondutiss Strong parallel to the eave
- Ensure 10 cm horizontal overlap and 15 cm at the ends
- Fix the underlayer securely with staples and large-headed nails.
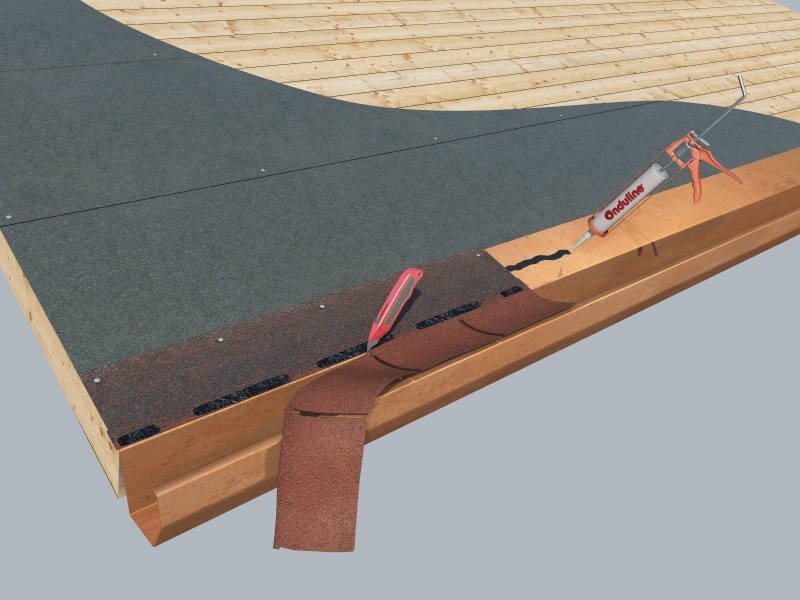
Fix Bardoline
- Guide wide-headed BARDOLINE nails: heads must be straight and deep without damaging the shingle.
- For steep slopes (> 60 °), use additional nails and Mastic sealant to seal.
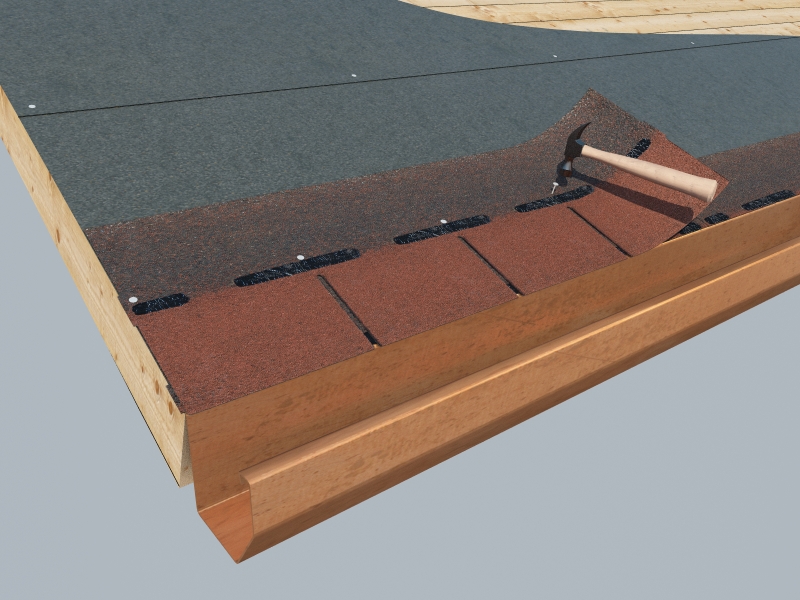
Install roof shingles
- Start installing roof shingles from the bottom and go on to the ridge. Start each row by the gable end.
- 1st strip: Prepare the first strip by cutting the head lap of the shingles. Shorten the shingle of one tab so that the joints are not aligned with the 1st row.
- 1st course: Start with a complete shingle and continue on the first row, fixing the shingles as you go.
- 2nd and following courses:
- Shorten the shingle of a tab. Secure the shingle so that the lower end of the tab aligns with the top of the 1st course shingle cut out.
- For 3rd course, shorten one tab.
- For the 4th and the following courses, always shift the shingle laying by shortening by half a tab
- Glue the rakes with Mastic sealant for a better seal.
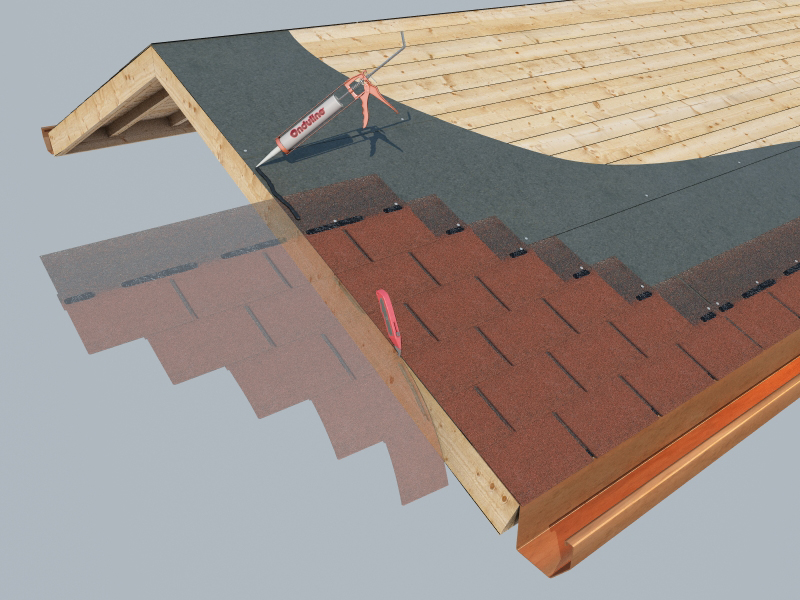
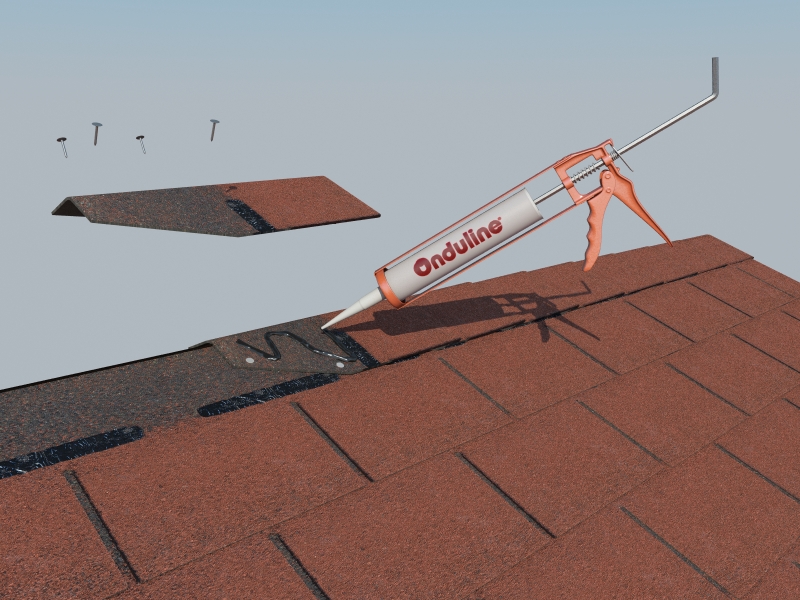
Fix the ridge
- Cut triangles at the notches of each leg to form each shingle ridge element.
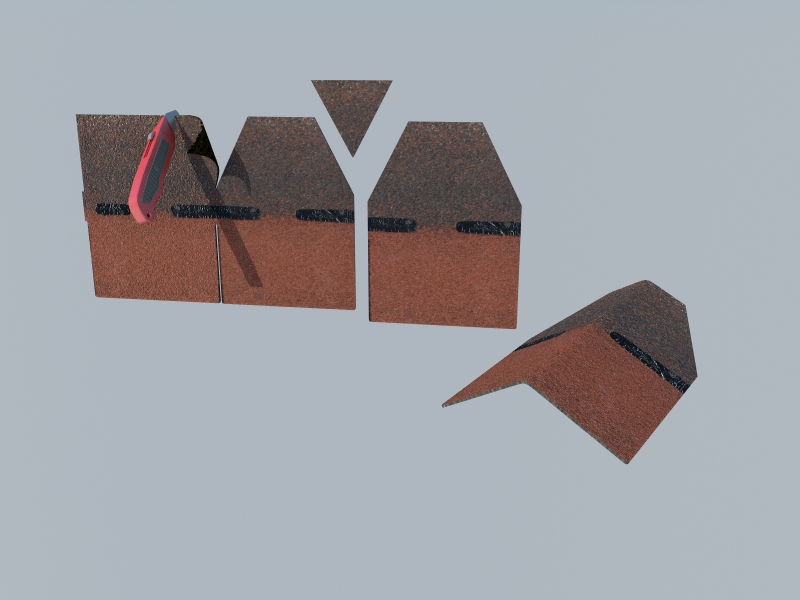
- Fix the triangles on ridge in the opposite direction to prevailing winds.
- Secure them with 2 nails on each side and an bead of Mastic sealant
For the installation of all the other specific parts of the roof, please have a look at our BARDOLINE installation guide.
Find several documents on BARDOLINE that may help you to sell and install our roofing shingles: commercial brochures, certifications, technical datasheets, declaration of de performance (DOP), …
Any question about installing roofing shingles? Please contact us!