
How To Build a Rabbit Hutch
31 July 2025Whether you’ve recently welcomed rabbits into the family or want to upgrade your current set-up, building your own hutch is a great way to create a cosy, secure and weatherproof home. It can be surprisingly simple, even if you’re not a seasoned DIYer.
To help you get started, we’ve put together an easy-to-follow step-by-step guide that walks you through everything you need to build your rabbit’s dream home in just one weekend.

Roof considerations
A big part of making your hutch safe and durable is choosing the right materials, especially for the roof. That’s where ONDULINE EASYLINE comes in.
Made from lightweight and durable bitumen, EASYLINE roofing sheets are ideal for small structures like rabbit hutches, due to their compact size (76cm x 100cm). They’re fully waterproof and weatherproof with a 10-year guarantee. The sheets are also UV-resistant with long-lasting colour, meaning your hutch will keep looking great with minimal maintenance.
EASYLINE sheets are made from the same noise dampening material as Onduline CLASSIC roofing which is four times quieter than metal roofing and helps create a calm and peaceful environment for your pets. And because they regulate temperature naturally, your rabbits stay cosy in winter and cool in summer.
What you'll need
Treated timber (frame and doors)
Timber battens (roof)
Timber cladding (walls)
Wood screws, hinges and latches (doors)
Galvanised mesh
ONDULINE EASYLINE roofing sheets and Onduline universal screws
Hand saw,
Fine-tooth saw
Electric drill
Screwdriver
Wire cutters
Tape measure
Spirit level
Right-angle brackets
Gloves
Safety goggles
Corner brackets
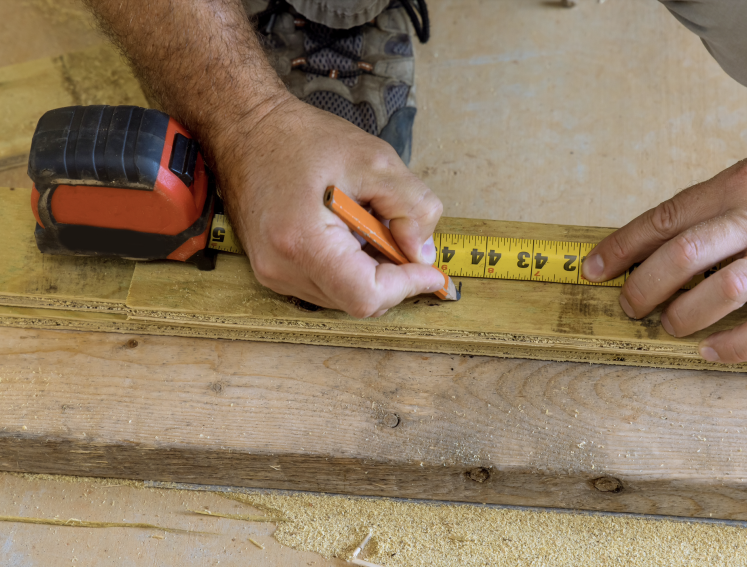
Step 1: Plan and prepare
Start by deciding on the size and layout of your rabbit hutch. A two-compartment design works well, with one enclosed sleeping area and one open, mesh-covered run. Be sure to allow space for your rabbit to hop, stretch, and stand upright comfortably
Sketch out a rough design and take accurate measurements. Then, clear the area where the hutch will be placed, ideally somewhere slightly sheltered and raised off the ground to help prevent damp.
When planning your design, it’s important to remember that EASYLINE roofing sheets require a minimum pitch of 10°.
Step 2: Build the base and frame
Begin by cutting your base and roof pieces from treated timber. Two-inch by four-inch battens are a good choice for strength and stability. Assemble the base and top into a rectangle using wood screws, pre-drilling holes to help prevent the wood from splitting.
Before cutting any wood, make sure to wear the correct PPE, such as protective gloves and goggles to help prevent injury.
Next, add vertical corner posts. These should be at least 40 to50cm high. Secure them upright using right-angle brackets or additional screws.
Remember to cut the tops of the posts at an angle to allow for the 10° pitch required for EASYLINE sheets.
Then, add horizontal support beams along the top edges to form the frame. This will hold your wall panels and provide a structure for attaching the roof later.
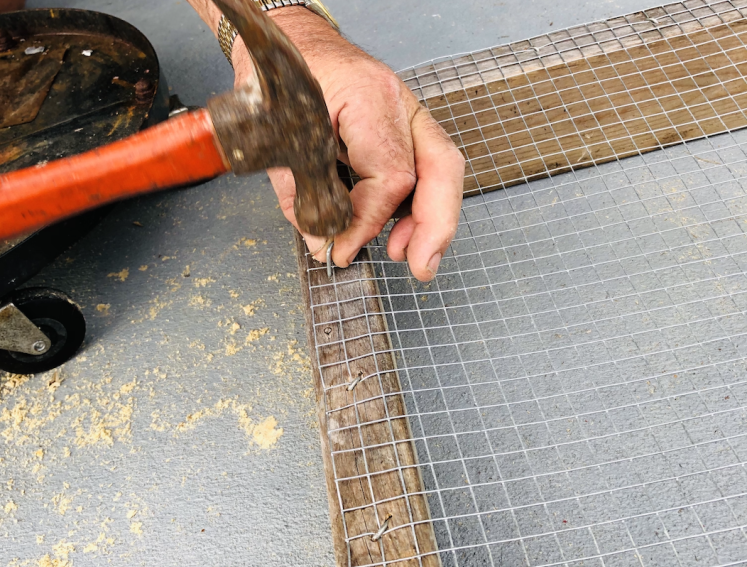
Step 3: Add walls and mesh
Now it’s time to enclose the structure. For the sleeping or enclosed area, we recommend using half-inch plywood or timber. Measure and cut exterior plywood or timber cladding to fit the sides and back, then screw these panels securely into the frame.
Start with the top panel on one side, screwing it into the back panel and then the front. Work your way down from there, repeating the process on the other sides.
For the open run section, measure and cut your galvanised mesh. Do not use chicken wire as it’s not rabbit-safe. Stretch the mesh tightly over the frame and fix it firmly in place using heavy-duty staples or washers with screws.
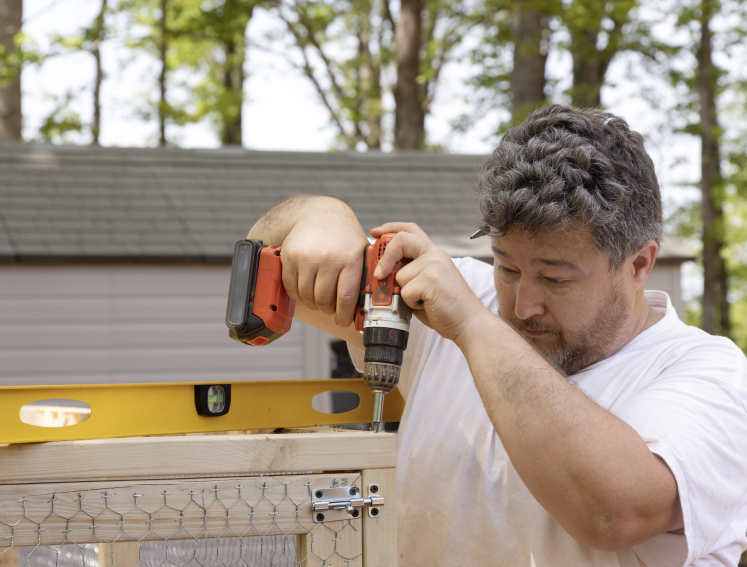
Step 4: Build and attach your doors
Once the walls are built and the mesh is attached, you can move on to the doors.
Measure each door opening carefully and note the width and height using plywood or timber (we recommend two-inch by two-inch timber, cut four pieces per door to form a simple rectangular frame. Use corner brackets to secure them.
For run doors, cut a piece of galvanised mesh slightly larger than the frame and attach it to the back using a heavy-duty staple gun or screws with washers.
For doors on the enclosed area, you can use timber panels or plywood to cover the frame. Alternatively, use mesh on the top half and timber on the bottom to allow both ventilation and privacy.
Check the fit by placing the door into the opening. It should sit snugly with a small gap of about 3-5mm on each side, so it opens freely. Trim if needed.
Mark the hinge positions (two per door), then screw them into the door first and then into the frame. Use rust-resistant exterior-grade hinges for durability.
Finish by attaching a latch or bolt to keep the door securely closed. If you’re concerned about predators, consider using a double action lock or a padlock.

Step 5: Add your roofing
Before attaching your EASYLINE sheets, first attach the battens to the roof vertically, keeping the spacing no more than 43cm apart.
Next, measure the top of your hutch and cut the EASYLINE sheets to size using a fine-tooth handsaw. Be sure to wear gloves and goggles while cutting.
Position each sheet so the corrugations run from front to back to allow rainwater to run off properly. The sheet should overhang at the front by at least 15cm and 7cm on each side. If you’re using multiple sheets, overlap them by one full corrugation.
Fix the sheets in place using Onduline universal screws through the ridges of the corrugations, securing them into your timber frame and battens beneath. Each sheet must be attached to every supporting batten, and every corrugation should be fixed at the eaves, overlaps and ridges. At the intermediate purlins, fix every second corrugation and stagger the fixings for added strength.
Step 6: Add the finishing touches
Now that the structure is complete, it is time to finish it off. Start by sanding any rough edges and checking for any screws or staples that may be sticking out.
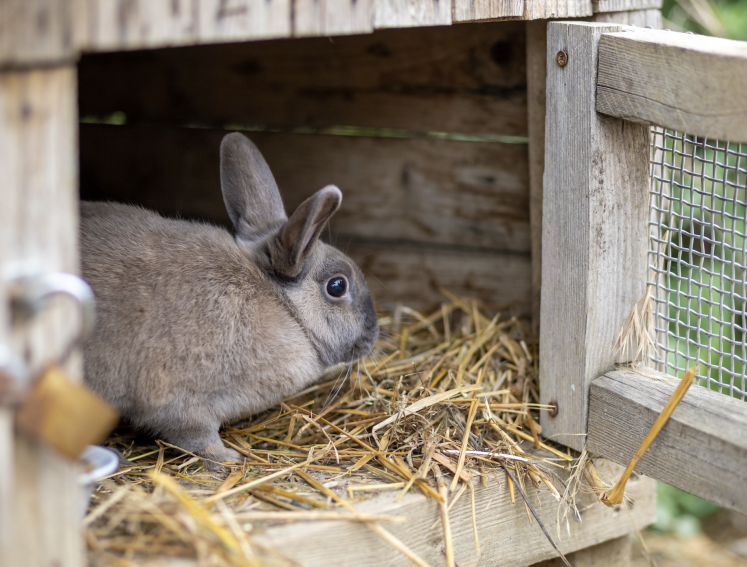
Inside the hutch, place a removable tray or line the base with newspaper, then add plenty of clean hay or straw for bedding. Include a water bottle, a food dish and a few toys to keep your rabbit comfortable and entertained.
Finally, inspect the hutch for any gaps or weak spots, especially around the mesh, to make sure everything is secure and escape-proof.
And there you have it, your cosy new home for your rabbits is complete. With a bit of time and care, you have created a safe, comfortable space where your rabbit can rest, play and feel right at home. Now all that is left to do is let them settle in and enjoy their new surroundings
For further information about installing EASYLINE, you can find our installation guide here.
Weekend Project Inspo!
Looking for some weekend inspiration? Our blog page is the perfect place to ignite your creativity and kick-start your garden projects! Whether you're a seasoned gardener or just starting out, we offer step-by-step guides, unique DIY ideas, and helpful tips that will transform your outdoor space.
