
Design and build your dream pergola
29 May 2025Whether you’re relaxing with a book or entertaining friends, a pergola is a great way to make more of your outdoor space – especially in the warmer months.
It doesn’t have to be costly or complicated either. With our step-by-step guide, you can build your own dream pergola in just one weekend.
For a pergola that lets in plenty of natural light, our ONDUCLAIR PC sheets, available in two profiles, are the perfect choice.
What you will need
Timber frame for support beams
Rafters and ledger board
Premixed concrete
Bolt-down anchors
Spare wood for temporary supports
ONDUCLAIR PC sheets
Step 1: Plan your pergola
Before construction begins, it’s important to decide the size and positioning of your pergola. As it will be attached to your home, you’re more limited in location choices, but it’s still important to consider factors like sun exposure and what will best complement your garden’s current aesthetic.
For pergolas attached to properties you won’t typically require planning permission. However, you should still check with your local authority for any restrictions to ensure your project complies.
Step 2: Prepare your posts
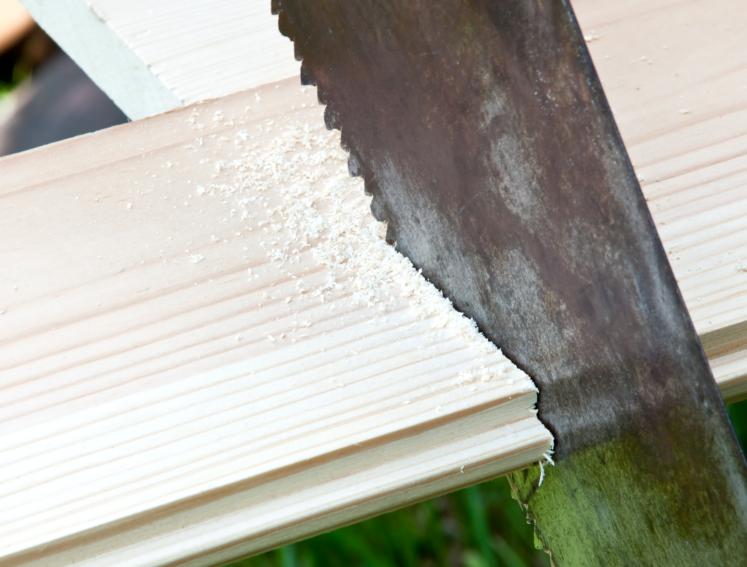
Once you’ve finalised your design, take measurements and cut your timber to size. We recommend 90mm x 90mm pressure-treated timber for the posts and a 200mm x 50mm ledger board. Since Onduline roofing sheets require a minimum roof pitch five degrees, position your ledger board higher than the posts and cut the post tops at the correct angle to achieve this slope.
Before cutting, always follow safety guidelines and wear the correct protective gloves and glasses when using tools.
Step 3: Secure your ledger board
Mark the height on the wall where the pergola will attach and drill pilot holes to secure your ledger board, using heavy-duty masonry anchors or lag bolts depending on the wall material. Remember to use your spirit level to keep it straight.
Apply waterproof flashing above the ledger to prevent water ingress between the house and pergola.
Step 4: Fit your posts
Once you’ve cut your posts and marked out where they will be positioned, you can begin installation. If your pergola will sit on grass, you should dig a hole and use premixed concrete to secure your posts. If you’re positioning it on concrete, an existing patio that you do not want to remove, or wooden decking, you can use bolt-down anchors.
For a pergola that requires holes for the posts, dig a 0.5 metre hole for each post ensuring they are all level before filling the holes with concrete. To give your posts a stronger base, it’s a good idea to use post supports alongside concrete.
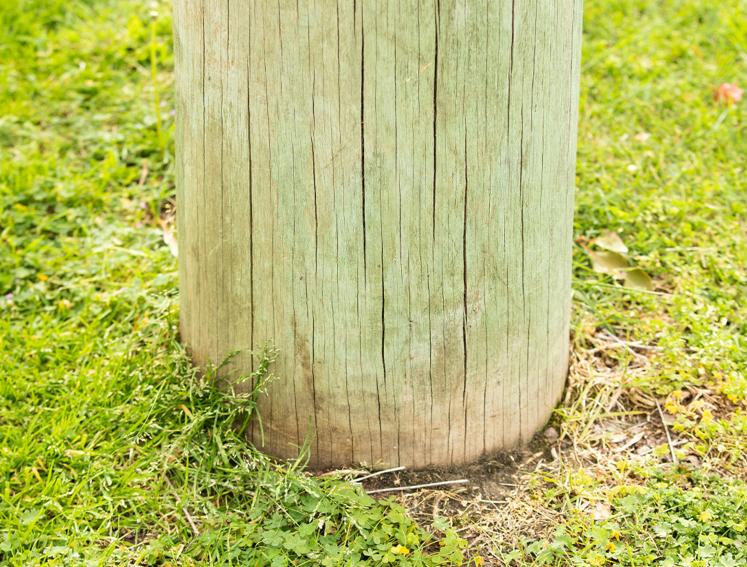
Posts secured with concrete
Once your posts are level, use timber offcuts or battens as temporary supports to hold them in place. Drop a few heavy stones into the base of each hole for added stability.
Following the premixed concrete instructions, pour in water, then the concrete. Use a stick or piece of wood to remove air pockets and level the surface.
Check the post is still level, adjust if needed, then leave to set as directed. Then repeat this process for your second post.
Posts secured with bolt-down anchors
Firstly, clean the area and ensure it is free of debris. Then place the anchor bolt where you intend to position the posts, tracing around it and marking where the bolts need to go.
Using a hammer drill and masonry bit to drill into the concrete the required depth for your bolts. If you’re attaching your pergola to decking, use a regular drill bit and ensure you drill into the framework and not just the wooden decking.
Then for concrete, insert the expansion bolts through the bracket into the hole and tighten with a wrench. For decking use lag screws or through-bolts with washers and nuts.
Insert the posts into the bracket and use lag screws or bolts to secure them through the side holes.
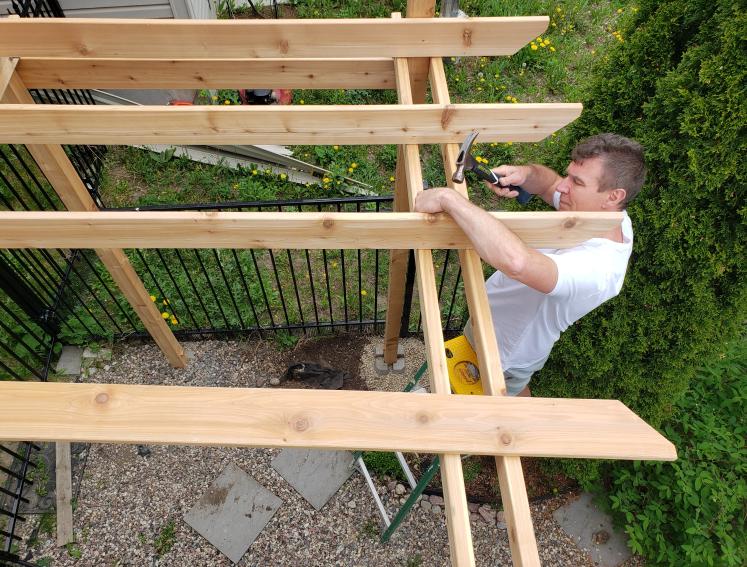
Step 5: Attach the support beams
Now your posts are secured, you can cut to size and attach the three support beams to your frame.
For ease, once you’ve cut your support beams to size, hammer a nail into the posts for the beam to sit on while you secure it. It’s also a good idea to use a clamp to hold the beam in place as you check they are level with a spirit level.
When you’re happy with the positioning, use a drill to create two equally spaced pilot holes in the beam and then fit them in place using coach bolts. Repeat this until both support beams are fully secured.
Step 6: Attach the rafters
The rafters will run across the top of your pergola, sitting on the support beam opposite the ledger board and attaching to the ledger board.
Measure your first rafter and cut to size and work out how many you will need for your pergola. Once you know the amount, use your first rafter as a guide to cut the rest.
Mark up where the rafters will sit on the support beam and ledger board and then drill the pilot holes into these marks and use woodscrews to secure them.
Step 6: Secure the roofing
Measure your roof to work out how many sheets you will need and if necessary, cut some to size using a fine-tooth saw, wearing the appropriate PPE.
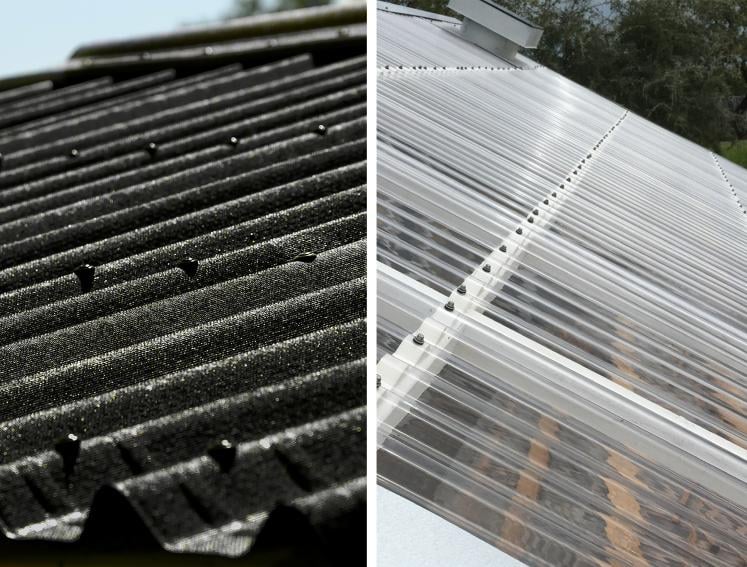
ONDUCLAIR PC
ONDUCLAIR PC sheets should be installed with the corrugations running down the slope of your roof, drill oversized holes (about 5mm larger than the fixing) on the top of the corrugations to allow for thermal expansion.
Lay your sheets overlapping each other by at least one corrugation and secure them with Onduline Universal screws spaced every two corrugations once all your sheets are positioned correctly. If you need a second row of sheets for your pergola, start the second row with a half sheet to stagger them.
For more details about installing ONDUCLAIR PC you can check out our installation guide here.

Step 7: Finishing touches
Now you’ve built your dream pergola, it’s time for the finishing touches to create your cosy haven. Add furnishing, cushions and solar powered lights to bring your vision to life, then all that’s left to do is enjoy your new addition to your garden.
Looking to build a freestanding pergola elsewhere in the garden? Our EASYFIX bitumen sheets are a great option for adding shade and privacy to standalone structures. Lightweight and easy to install, they offer a practical and stylish roofing solution for creating a cosy, sheltered spot away from the house.
Weekend Project Inspo!
Looking for some weekend inspiration? Our blog page is the perfect place to ignite your creativity and kick-start your garden projects! Whether you're a seasoned gardener or just starting out, we offer step-by-step guides, unique DIY ideas, and helpful tips that will transform your outdoor space.
