

Onduline’s INNOLINE roofing sheets: A step-by-step guide
28 October 2026Whether you're building a new garden shed, upgrading an ageing roof or giving an outbuilding a fresh look, choosing the right roofing material can make all the difference.
INNOLINE combines the traditional appearance of roof tiles with the practicality of lightweight roofing sheets, making it a great choice for a range of outdoor projects. Available in Black, Anthracite Grey, and Terracotta the sheets are designed with DIY installation in mind, with no specialist tools required.
And with a little preparation and the right approach, fitting your new roof can be more straightforward than you might think.
Ready to get started? Follow our step-by-step guide to installing INNOLINE roofing sheets.
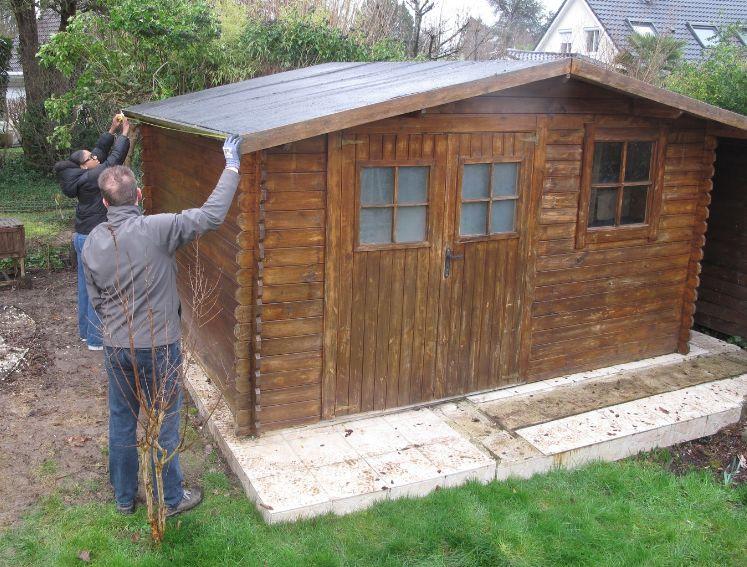
Step 1: Prepare your roof
A successful installation starts with a properly prepared roof surface.
Before laying any sheets, check that the entire roof deck is clean, dry and free from bumps, gaps or protruding screws.
A smooth, level surface will help ensure the sheets sit correctly and maintain their shape and stability over time.
Taking a few extra minutes to prepare the roof now can help avoid problems further down the line.
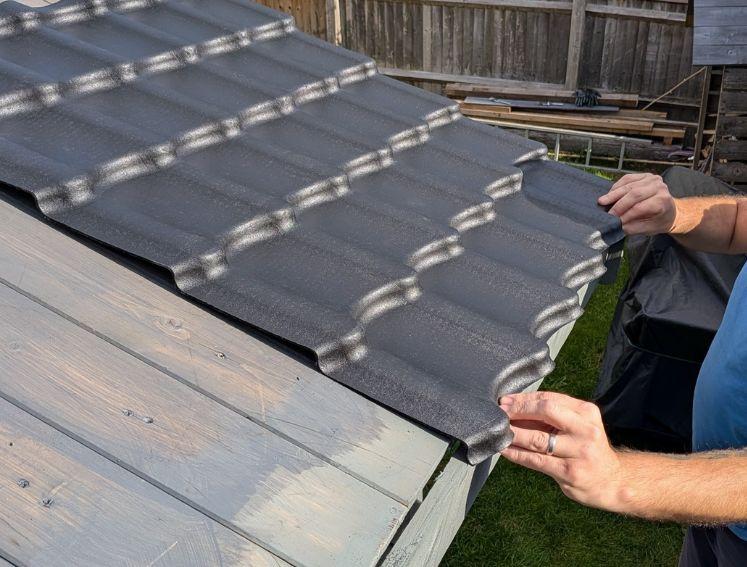
Step 2: Position your INNOLINE sheets
With your roof prepared, it's time to work out how the sheets will fit.
Start by laying out the sheets without fixing them, beginning at the lowest edge of the roof and working upwards towards the ridge.
Carefully align the first sheet with the roof edge, allowing a maximum overhang of 2cm at the eaves. Keeping this consistent will help ensure the remaining sheets follow a straight line.
You can leave a gap of up to 10cm at the top of the roof and 4cm at the sides, as these areas will be covered by the finishing accessories.
Each sheet must overlap the adjoining sheets by at least one corrugation, both horizontally and vertically, to help rainwater drain correctly.
If you need to adjust the coverage, simply increase the overlaps rather than cutting the sheets. This makes it easier to achieve a neat finish while reducing the need for additional tools.
Once you're happy with the positioning and spacing, double-check that all the sheets overlap correctly before reaching for your drill. Taking the time to get this right will help ensure a neat finish and effective rainwater drainage.
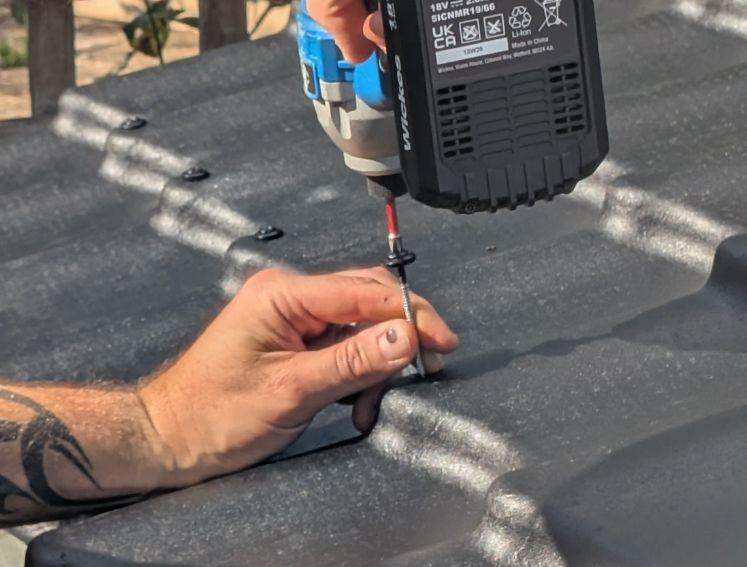
Step 3: Secure the sheets in place
Now that everything is aligned, you can begin securing your INNOLINE sheets to the roof.
Always use ONDULINE screws with integrated seals, which are designed to provide a watertight fixing. Standard wood screws should not be used, as they could affect the performance of the roof.
Fix each screw through the crest (highest point) of the corrugation, rather than the valley, keeping the screw perpendicular to the roof surface. Tighten until the screw sits flat against the sheet, without overtightening.
Each sheet requires a minimum of 10 fixings.
Start by securing the centre of your first sheet along the eaves edge, leaving the top and side overlap areas free.
Position the next sheet, overlapping the first by at least one corrugation, and secure the overlapping area before continuing with the remaining fixings.
Repeat this process as you work across the roof and upwards towards the ridge, making sure each sheet is correctly overlapped before fixing it fully.
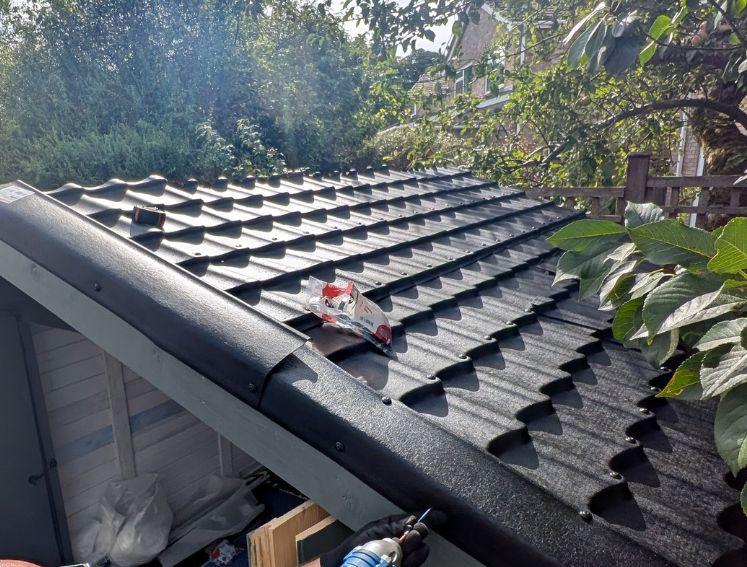
Step 4: Add the finishing touches
With your roofing sheets securely in place, the final step is to fit the finishing accessories.
Start with the INNOLINE verge trims, which protect the exposed edges of the roof and create a neat finish. Position each trim with its wider side facing upwards, ensuring it covers a full corrugation. Fix the trim first to the wooden side support and then to the roofing sheets.
Work from the bottom of the roof upwards, overlapping each verge trim by at least 15cm.
For a pitched roof where two slopes meet, you'll also need to install an INNOLINE ridge along the top. Position these centrally, overlapping each section by at least 15cm, and secure them through the crest of each corrugation.
For an extra finishing touch, you can even add a small decorative wooden piece at the ends of the ridge cap, using leftover timber from your project.
Give your garden building a fresh new look with INNOLINE
And there you have it! With the right preparation, careful positioning and secure fixings, your garden building can benefit from a smart, tile-effect roof that's designed to stand up to the elements.
Whether you're tackling a shed renovation, building a new garden office or upgrading another outdoor structure, INNOLINE offers a practical way to achieve the appearance of traditional roof tiles without the weight or complexity of individual tiles.
What's more, INNOLINE is backed by a 20-year waterproofing guarantee, giving you added peace of mind.

Watch the INNOLINE Install Video
Ready to get started on your next project?
Discover INNOLINE and explore the range of colours and accessories available.
